I love pudding. Any kind. It's all miraculously delicious in my book. I even tried black pudding not too long ago from a fancy-type restaurant and thought it was SUMPTIOUS! For those of you who aren't aware, Black Pudding is a savory pudding made from cooking blood with a filler and spices. GROSS RIGHT?!! I thought so too and sneered at it disdainfully in Taiwan last summer. It's eaten all over the world and I thought it was about time I tried.
Anyway I digress, I'm not making Black Pudding in this post so don't worry. You're safe. What I am making are two different kinds of pudding. Raw Chocolate Chia Seed and Leftover Rice Pudding.
Okay so you may have noticed that I don't use much milk or dairy in my recipes. That's because it hurts my tummy so in all the recipes when I say milk, I'm using unsweetened almond milk which can easily be swapped out for regular milk.
Chia Seed Pudding
This one is SUPER EASY AND REALLY REALLY GOOD FOR YOU!! Chia seeds contain something like three times the daily necessary omega-3 oils and when you soak them they thicken. You can buy black or white chia seeds at most large grocery stores in the health food section but they tend to be expensive so keep your eyes peeled at bulk food stores and try to buy them like that.
I make a chia seed pudding almost every evening after supper.
I don't know where I got this from (we were NOT a dessert-after-dinner kind of family) but I always always crave something sweet after dinner. Before I sit down to eat, I put two heaping tablespoons chia seeds into a dessert dish (sometimes I do this in a wine glass cause it makes me feel fancy) with 1 cup unsweetened chocolate almond milk and 1 tablespoon maple syrup. And then just let it sit for a minimum of 15 minutes. Stir it a couple times before you eat it.
It get's to be the consistency of tapioca pudding but the seeds are a bit crunchier. Yum!!
Leftover Rice Pudding
You can make this with any kind of rice (hmmmmm or quinoa probably but I haven't tried it). I used leftover basmati rice.
Pre-heat oven to 350.
In a saucepan combine:
1 cup cooked rice
2 cups milk
and bring to a boil. Stir it often so it doesn't burn.
Beat together:
2 eggs
1/4 teaspoon Cinnamon
1 Tablespoon White sugar
3 Tablespoons Maple Sugar or Brown sugar or Maple Syrup (if you use syrup then you have to bake the pudding for an extra 10 minutes or it'll be soupy).
Add the egg mixture to the hot milk. MAKE SURE YOU KEEP STIRRING THE MILK AS YOU'RE POURING OTHERWISE THE EGG WILL COOK UNEVENLY. Pudding needs to be stirred, it's a custard thing.
Let the whole kit and caboodle cook on the stove for about a minute at a low simmer and then pour it into a glass baking dish with a lid. Cook for 20 minutes with the lid on. Take the lid off give it a stir and then cook for 10 minutes, lid off.
It's not the most attractive pudding so I made a maple syrup reduction (boil1/2 cup maple syrup to 112 degrees on your candy thermometer) and put a couple strawberries and mint leaves on top of each bowl. Drizzle it with the reduction and it looks much more presentable!
Thursday, 17 May 2012
Thursday, 3 May 2012
Soup's up!
Soup soup soup
I have two kinds of delicious soup sitting in my freezer which means that I don't have to cook for the next couple weeks!
I'm moving in two weeks and I don't want to buy more groceries. I'm in "using up what I got" mode and that can make for some interesting meals...
The two kinds of soup sitting my freezer are:
Roasted Garlic Potato Leek
and
Turk-ish Bean
Start by roasting a chicken...
Uuuuuum okay so that's how I started because the local meat guy had a sale on free-range birds.
Roasting a whole chicken is ridiculously easy.
Pre-heat the oven to 375
Rinse your bird and pat her dry.
Stuff the body cavity with an onion and an apple or an onion and whatever other piece of cold weather fruit you have on hand that needs usin'.
Rub the skin with olive oil and salt and pepper. Close her up and stick her in the oven for about and hour, depending on size.
A roasted bird was enough food for 2 chicken salad lunches, one chicken dinner and chicken stock for days. Awesome!!
To make the stock, toss a couple carrots, an onion quartered, some celery with the leafy bits, the chicken bones, and a bay leaf in a pot and cover with water.
Boil till the water has reduced by half. Boom stock.
The stock was the base for both my soups and I used the picked clean chicken bits in the Turk-ish Bean. Both these recipes would be equally delicious with Veg stock and no chicken bits.
ALL soups should be started by sauteing onions in a large pot until they are translucent.
Turk-ish Bean
Add one can of diced tomatoes, one can of chickpeas and one can of whatever other kind of beans you've got to your large pot that contains two onions sauted in oil. Add 2 cups chicken stock and here comes the Turk-ish part:
1/4 teaspoon cinnamon
1 teaspoon cummin
1/2 cayenne
I don't know if that spice combo is exactly Turkish but there you have it. I would NOT add more cinnamon than that, a little goes a long long way.
Salt your soup to taste. You can add (especially with homemade stock which is NOT as salty as store-bought) quite a bit. I probably, all together, put in about 1 Tablespoon but it's hard to tell cause I add and taste as I go.
Bring to a boil.
Eat. Freeze. Eat.
Roasted Garlic Potato Leek
Cut the top off a head of garlic, just enough so that you can see most of the flesh but you don't lose much meat. Place in the center of a square of tinfoil and drizzle with oil and sprinkle with a pinch of salt. Wrap that sucker up and place in the center of your oven. Turn the oven on and cook for about 40min as your oven heats up.
In that large pot that we talked about earlier that has some onion sauteing in it, add chopped up leek.
A word on cleaning leeks. First time I got one I had no idea how to clean it and well yeah it was gritty. So cut it up before you clean it and put the chopped bits into a colander. Rinse with cold water and use your fingers to separate all the layers so the water gets into all the little crevices. Alternatively, you can chop them and submerge them in water and then spin dry them in a salad spinner (my current kitchen doesn't have a salad spinner... it's off fraternizing with the slotted spoon...)
Saute these puppies up with the onion and then cover with 2 cups of stock and 2 cups of water. Add 4-6 potatoes, depending on their size. Be generous with the salt and pepper. Cook till the potatoes are tender.
Stick the pot outside to cool while the garlic finishes roasting. Once everything is cool enough to not make you swear and jump around after sticking your finger in it, ladle the soup into a blender.
I add all the garlic into the first blended batch cause you're gonna mix all the blender batches together and adjust the seasoning before you're done anyway.
It's a pretty bland looking soup so throw some fresh parsley or dill on top to pretty things up. Remember it's not how tasty it is that matters, it's how good it looks... nah just kidding!
Eat. Freeze. Eat.
Friday, 24 February 2012
Kale GLORIOUS Kale!!
I love Kale.
I don't want to over analyze my relationship with this beautiful green goddess but I'll name just two in a myriad of reasons why Kale is the best green:
1. She is the only green that I can buy in the winter which was actually grown in Quebec.
2. She so damn good for y'all!
So here are two recipes, one of which is sinfully simple and the other of which is too fun to make cause you get to drink at the same time! Beeeeeeer!
Kale Salad
Wash, and cut the spine out of about 4 large leaves of Kale.
Chop them up into bite sized pieces and toss in a bowl.
Toss one green onion, chopped up in there too.
Whisk together:
The juice of half a lemon
3 Tbs olive oil
1/2 teaspoon salt
and some pepper
Pour this over the salad and let sit for about an hour. The salt and acidity of the lemon break the Kale down a tiny bit and make it really nummy.
To serve:
Add fresh dill (if you have it), feta cheese (mmmmmm goat feta...), and some kind of nut (LIKE ME! haha sorry couldn't resist)
Eat.
Spicy Sausage, Kale and Beer Soup
In a large pot, squeeze the innards out of 4 spicy sausages and saute until brown. Scoop the bits out of the pot and reserve for later.
Open your bitter, full flavoured IPA from the local microbrewery (or you know, whatever kind of beer you want) and have a drink.
Saute 1-2 diced onions in the drippings from your sausage and about 2 Tbs olive oil (depending on how greasy your sausages are, you might not need this much oil) until onions are translucent and tender.
Cover with 2-3 cups broth of your choosing and add about a cup of yellow split peas... you could use green, their just not as good looking, like Kermit said, "It isn't easy being green.
Take another sip of beer and then pour a generous glug glug into the pot. Bring this mixture to a boil and simmer until the potatoes are tender.
Add 4 to 5 leaves of washed, de-spined and chopped Kale and your sausage. Cook until kale is soft about 7 minutes.
Eat. Oh man, so delicious!
Thursday, 16 February 2012
Choc-TASTIC!!! Quinoa Chocolate Cake with Dark Chocolate Ganache!
This past weekend was my wonderful friend Robin's birthday (but don't tell her I've mentioned her again in my blog, she`s getting kind of a big head about it) and due to some various dietary restrictions in the group, I decided to make her cake gluten-free, dairy-free.
Do not be concerned. This cake was so delicious that we devoured the leftovers the morning after her party like hungry sharks attacking their prey.
Wet:
2 cups cooked quinoa
1/2 cup almond milk (or other alternative milk)
4 eggs
1 tsp vanilla
3/4 cup canola oil
Dry:
1 1/2 cups sugar
1 cup unsweetened cocoa powder
1 Tbsp baking powder
1 tsp salt
So, start by cooking you quinoa. Give 2/3 of cup uncooked quinoa a good rinse and then toss it in a pot with 1 1/3 cup water. Bring to a hearty, rolling boil and then reduce heat, cooking about 15mins until water is absorbed and quinoa is tender.
This should make about 2 cups of cooked quinoa (it made a little extra for me so measure it out after it's cooked). In a food processor (I found that my friend's food processor worked really well for this cake because it kind of beats up the quinoa but you could probably make this using your brute strength) combine the milk, eggs, and vanilla. Add the cooked quinoa. Mix until blended and then gradually add the oil (or melted butter if you can have it).
In a separate bowl combine the dry ingredients. Mix them with a fork until everything is happily homogenous. Also the recipe I used called for 1 1/2 cups cocoa powder and while Robin`s cake turned out great, next time I make this I am only going to use 1 cup. That extra cup was just pushing the cake over from deliciously chocolatey to slightly chalky (only I noticed).
Bake at 350 in a well greased cake pan for 45-50 minutes.
Ganache
I have always known that ganache is the tastiest thing that can be poured/spread/slathered over a cake but I have always reserved it for FANCY occasions. I have now decided that that`s stupid. Ganache is the easiest icing to make. Period. It also fancy-fies just about any dessert. Want to look impressive? Make ganache.
Break two 100g bars of dark chocolate up into a bowl (Martha Stewart`s recipe calls for 8 ounces of bittersweet chocolate to 1 cup cream or milk. 200gs of chocolate is slightly more than 7 ounces)
Bring a scant cup (about 3/4) of almond milk (or other blah blah blah) to a boil in a saucepan and pour over your chocolate pieces. Whisk this marvelous mixture up until the chocolate has completely melted. Put the bowl in the fridge (or out on the front porch if it`s winter and your friend`s fridge is insanely full) and whisk it every ten minutes until it reaches the desired thickness. For me that meant a thick pourable and probably took 20 minutes to cool. You want to check it every ten minutes so that it cools evenly and so you don`t miss the pour/spread/slather stage.
My sister used this recipe on Valentine`s Day and almost missed the optimum window. She wanted to know if ganache can be reheated and I replied ABSOLUTELY!
My favourite thing to do is make a double batch and let it cool until it`s the texture of thick store bought icing. You can then slather on a thick layer and smooth it out as best as you can. Pop it in the fridge for 10-15 and then re-heat the remaining ganache in the microwave.
Remember when re-heating or melting chocolate in the microwave to do it in 5-10 sec spurts cause it burns or seizes really easily if you`re not careful.
Once the ganache can be poured, transfer your cake to a wire cooling rack sitting on a cookie sheat and pour the hot ganache over the iced cake. You end up with a shiny, glossy shell on your cake that everyone will ooh and aah over. Once the outer layer has hardened, transfer it CAREFULLY from the cooling rack to your serving plate!
I learned the cooling rack trick at a bakery I used to work at. It gives your cake perfect edges, with no pooling on the serving plate. You better be ready to impress people with this one folks!
Serving instructions:
After an ENORMOUS DINNER and a long walk outside serve guests a dainty little slice on pretty china plates. The following morning emerge from your various crash spots and devour remaining cake like piranha's who haven`t seen flesh in about 90 years.

Sunday, 15 January 2012
Dukhobor Borscht! So delicious
This is the wintery companion piece to my earlier Borscht post.
Dukhobor Borscht is quite different from Russian Borscht. It only has one beet that is cut in half and boiled in the stock it is then unceremoniously removed and discarded (or eaten, if you're like me and love beets). Dukhobor Borscht also takes kind of a long time to make and is full of steps. Each vegetable is sauted before you put it in the pot and it contains both diced and mashed potatoes. But trust me on this one guys it is TOTALLY worth the effort.
The recipe I have makes a big batch that I will be freezing. Tonight I'm eating it with cabbage-potato pancakes and plain yogurt.
Let's go!
Ingredients:
1 large can whole tomatoes
1 1/2 cups Butter or olive oil (okay so that's the amount the recipe actually calls for but I end up using probably a third of that. When you saute all the veg in that much butter it does taste delicious though... so I'll leave the amount decision up to your excellent discretion)
3-4 medium onions (should make about a cup of chopped onion)
1 carrot, grated
1 carrot, chopped
2/3 of a cabbage (should make about 3 cups shredded)
5-8 potatoes
1 cup Cream (optional)
1 medium beet
Dill
Salt (or dill-salt)
Before you start sauteing:
Put into a LARGE pot one and a half quart sized mason jars of water (you know the size of jar, think those glass ones that you get spaghetti sauce in).
1 1/2 teaspoons salt (I have dill salt that a friend gave me so I'm using that. Also because at this time of year fresh dill costs more than I care to spend)
3/4 of your potatoes washed and quartered
The chopped carrot
The beet, halved
Boil until the potatoes are tender enough to remove and mash. When they are tender enough to do that, then do it. Mash with olive oil (I made an almost no dairy version of this recipe so whenever I say "olive oil and salt" feel free to read "butter"), salt and cream (If you want. I used a bit of plain yogurt)
Start the sauteing process by dumping the can of tomatoes into a large frying pan with some olive oil and salt and give the tomatoes a gentle mash. Let this simmer till it thickens. Dump that in a big ol'bowl and put it off to the side.
In your large frying pan put in a generous drizzle-glop of olive oil and add the onion and grated carrot with a dash of salt. Saute this until everything is nice and tender. Onions should be translucent not brown. Dump into the tomato bowl and set aside.
Add a generous drizzle-glop of olive oil and add your cabbage. Saute until tender and then...
When the potatoes are tender enough and you've removed and mashed them, add the remaining potatoes diced, and the cabbage. Cook this until the now diced potatoes are tender but not mooshy.
What you should have by now is a big bowl with tomato, carrot and onion in it, another bowl full of mashed potatoes and a big pot with diced potatoes and carrots and beet stock. You can remove the halved beet at this point and add the tomato, carrot bowl. Bring this up to a boil and gradually add the mashed potatoes.
The borscht ends up an amazing texture because of the diced and mashed potatoes and it tastes amazing! Putting fresh dill or parsley in at this point is also nice. Enjoy!! I sure am!
Sunday, 4 December 2011
Felafel Success!!!!!!!!!!
This weekend I had a ravishingly radiant Robin visitor!! She inspired me to make attempt #2 of homemade felafels... attempt #1 being a resounding and resplendent failure.
Long story short my mixture (from canned chickpeas) was too soupy and my carefully formed balls disintegrated in the frying oil. Quel dommage!!
But this time around they were perfect!

Seriously! How good do those look?!! Haha I knew this post was going to have a lot of exclamation points in it!
The trick, I've discovered, is to use dried chickpeas and not to cook them.
So...
Put 1 cup of dried chickpeas in a bowl full of cold water and let them soak overnight.
A few hours before you want to eat dinner, assemble your felafel balls and refrigerate them. The recipe I was using says this helps keep them together in the hot oil.
In a food processor add:
drained chickpeas
1/2 cup fresh chopped parsley
1 small onion
4 ish cloves of garlic
1/2 tsp baking powder
1 tsp chili powder
1 tsp salt
1 tsp cummin
Whuge everything together until combined and then add 2-4 tablespoons of flour. The flour helps dry the mixture out so it depends on humidity etc for the amount. You should be able to form the mixture into a ball in your hand without it seriously sticking.
Form into walnut sized balls and refrigerate.
When you're ready to eat them, heat 1 1/2-2 inches of oil in a frying pan at medium high heat.
Check to see if the oil is hot enough by spattering a couple TINY droplets of water into the pan. If they crackle and spit then the oils hot enough. I usually just wet a few of my fingers under the tap and kind of flick them at the surface of the oil. Feel free to flick water at your friend at this point as well.

I then put the felafel balls into the frying oil and fried them for about 5 minutes on one side and then probably 3 minutes on the other. I have metal tongs that I used to turn them and they came out a beautiful golden brown!!
We ate them in whole wheat petas with fresh tomato, grated carrot, lettuce, hummus and tatziki. How does one make Tatziki you might ask? Simple.
Grate half a cucumber into a sieve, over a bowl and salt it. Leave the cucumber to drain for a couple hours to get some of the water out.
You can skip this step and just mix it all together but if you keep the tatziki overnight the water you didn't drain out separates from the yogurt and whole thing gets kind of weird. And not good weird.
Mix the drained cucumber with garlic, salt, pepper, the juice of one half lemon, fresh dill or parsley and a little over half a cup of plain yogurt. Slather generously on Felafel.
 Eat and be joyful!!!!!!
My plan is to make up the rest of the felafel mixture tonight and freeze half of them raw and the other half fried and see which way works better. I'm kind of hoping that the ones I fry will be initially soggy when defrosted but after popping them in the oven they'll crisp up again. I'll let you know how it all turns out. I promise.
Long story short my mixture (from canned chickpeas) was too soupy and my carefully formed balls disintegrated in the frying oil. Quel dommage!!

Seriously! How good do those look?!! Haha I knew this post was going to have a lot of exclamation points in it!
The trick, I've discovered, is to use dried chickpeas and not to cook them.
So...
Put 1 cup of dried chickpeas in a bowl full of cold water and let them soak overnight.
A few hours before you want to eat dinner, assemble your felafel balls and refrigerate them. The recipe I was using says this helps keep them together in the hot oil.
In a food processor add:
drained chickpeas
1/2 cup fresh chopped parsley
1 small onion
4 ish cloves of garlic
1/2 tsp baking powder
1 tsp chili powder
1 tsp salt
1 tsp cummin
Whuge everything together until combined and then add 2-4 tablespoons of flour. The flour helps dry the mixture out so it depends on humidity etc for the amount. You should be able to form the mixture into a ball in your hand without it seriously sticking.
Form into walnut sized balls and refrigerate.
When you're ready to eat them, heat 1 1/2-2 inches of oil in a frying pan at medium high heat.
Check to see if the oil is hot enough by spattering a couple TINY droplets of water into the pan. If they crackle and spit then the oils hot enough. I usually just wet a few of my fingers under the tap and kind of flick them at the surface of the oil. Feel free to flick water at your friend at this point as well.

I then put the felafel balls into the frying oil and fried them for about 5 minutes on one side and then probably 3 minutes on the other. I have metal tongs that I used to turn them and they came out a beautiful golden brown!!
We ate them in whole wheat petas with fresh tomato, grated carrot, lettuce, hummus and tatziki. How does one make Tatziki you might ask? Simple.
Grate half a cucumber into a sieve, over a bowl and salt it. Leave the cucumber to drain for a couple hours to get some of the water out.
You can skip this step and just mix it all together but if you keep the tatziki overnight the water you didn't drain out separates from the yogurt and whole thing gets kind of weird. And not good weird.
Mix the drained cucumber with garlic, salt, pepper, the juice of one half lemon, fresh dill or parsley and a little over half a cup of plain yogurt. Slather generously on Felafel.

My plan is to make up the rest of the felafel mixture tonight and freeze half of them raw and the other half fried and see which way works better. I'm kind of hoping that the ones I fry will be initially soggy when defrosted but after popping them in the oven they'll crisp up again. I'll let you know how it all turns out. I promise.
Monday, 21 November 2011
Chicken and Resting on My Laurels.
So you may have noticed that I haven't blogged in a while. Well that's the thing with being one person who consistently makes enough food for four! I always freeze my extras and that's what I've been eating for the past two weeks.
Sorry but I just didn't feel that a post about defrosting spaghetti sauce was really gonne be that interesting!
Today I made something that was all kinds of delicious!
Basically shake'n'bake chicken legs but I made all the stuff myself.
So what I've recently discovered (while reading recipe blog after recipe blog about fried southern chicken, I don't know I think it's a cold weather craving...) that if you give chicken a buttermilk bath before coating it and frying it, well it's just the darn-tootenist!
I didn't fry my chicken. My reason? Honestly? It seemed wasteful to use that much oil. I wasn't worried about the calories, or the dangers of a pan full of boiling oil but the cost. Of oil, which might be one of the cheapest things in my pantry. It's official, I am the cheapest human alive.
Another thing, who buys buttermilk? Bizarre. There's not really much else to do with it but bathe chicken legs... and I can eat a lot of chicken but that's ridiculous. So wherever a recipe calls for buttermilk I use watered down plain yogurt. Wherever a recipe calls for sour cream I also use yogurt. I am a fan of the yogurt.
So I made a little swimming pool for my poultry legs with:
The juice of one half lemon
Several glops of yogurt
A chopped up clove of garlic
And a teaspoon of cumin
I let them marinate for about 2 hours and then I shook of the marinade and coated them in salt and pepper seasoned cornmeal.
Bake for 30-40 minutes at 350 and enjoy!!

Monday, 7 November 2011
Cabbage and Potatoes, so delicious!
Daylight savings has forced us all to fall back and while it is nice to see a bit more sunshine when my alarm goes off in the morning it makes walking home from work in the almost pitch dark make me crave warm, carbolicious comfort foods.
Give these bad daddies a try and you won't be sorry!
Potato pancakes are almost as delicious as French Fries. When you put cabbage in them and serve them with parsley garlic yogurt sauce it makes for one hell of a dish!!
So, slice your green cabbage nice and thin and saute it real sweet and slow with about a tablespoon of butter (don't be afraid of butter). Give it a generous salting as well.
Cabbage takes a lot longer to soften than onions so once it has softened and become slightly translucent add onion. For this recipe I used half a cabbage and two medium sized onions. But you could make a smaller or larger batch easily (obviously...)
While the onion is cooking, put a pot of water on to boil and throw in 2-3 halved potatoes. Blanch the potatoes for just under 10 minutes. Take the cabbage onion hash off the heat and grate the potatoes into a bowl. Add the hash and two eggs. Salt and pepper at will.
Heat a couple generous glops of oil in a frying pan on medium high heat and shape the hash-egg mixture into patties. Fry each patty on either side till they`re lovely and crispy and golden about 2 minutes.
Serve with a yogurt sauce made from about half a cup of yogurt, 2 heaping teaspoons of fresh chopped parsley, salt and pepper and some minced garlic. Yum Yum Yum
I had some today with a serving of Borscht I took out of the freezer. You could also make them in the morning, or afternoon or at 2am when you inevitably crawl out of bed to pee. The potato loves you and you love it!
Thursday, 27 October 2011
The Most Beautiful Bread in the World
Add this bread to that list you have. You know the one. The one titled:
Super Impressive Things that I Bring Over to Other People's Houses that They Think are Really Hard to Make so I look Incredibly Impressive but Actually They're Sinfully Easy, Ha Ha!
If you don't have this list, promptly make one.
 This bread is so beautiful I want to spend the rest of my life taking pictures of it and then scrap booking the pictures in a scrap book made from THIS BREAD!!
Easy-Peesy No-knead Bread
This cutey-pie little recipe is floating around the internet these days and it leaves a lot of room for creative experimentation! All it takes to pull off is the foresight to mix the ingredients the night before you actually want to eat it.
The night before, in a large bowl, combine:
3 cups flour (1/2-1 cup of which can be whole wheat or spelt, etc) I have been using 1/2 of dark rye flour these days and it's scrumptious.
1-2 tsps salt (the first time I made this I only used 1 and this second time round I used 2 but it seems a bit overly salty so I'll probably do 1 and a bit the next time)
I also added 1/2 cup sesame seeds because I've still got a butt-load of from when I made bagels. You could also use flax seeds. So this is going to be a seedy bread. Yum Yum Yum
Currently my bread is 2 1/2 cups white flour, 1/2 dark rye and 1/4 flax seeds and I'm addicted.
Yeast It's your choice. Either use 1/4 teaspoon Instant Yeast and just throw it in with the dry ingredients or pre-proof 1/2 teaspoon regular yeast in 1/4 cup warm water with a dollop of honey or maple syrup (that's what I do)
Add
1 1/2 cups warm water and stir with a fork till it's all combined. I ended up adding an extra scant 1/4 cup of water because I added the sesame seeds and had too much dry loose stuff hanging out in the bottom of the bowl. Done. Cover and go bed.
Finish tomorrow.
I had some quick oats in my cupboard and the recipe called for a cornmeal coating to keep it from sticking to the pan. I used the cornmeal on round one of this bread but thought I'd switch it up and it worked so so well!!
To bake the bread you prepped last night turn the dough out onto a lightly floured surface. Make your hands a bit wet so the dough doesn't stick to them. Just pull the edges up and push them gently into the centre to make a kind of belly-button on the top of the bread. It really doesn't need to be kneaded.
Then gently put the whole thing in a clean dish towel sprinkled with flour, cornmeal or oats and tuck it in for another 1-2 hours of rising.
With me so far? The bread rose over night and all day, so 9pm-4pm. Then I belly-buttoned it and tossed it in oats. One more rise from 4:30pm-6:30pm ish.
At 6pm put an oven-proof pot with a lid in the oven and preheat the pot and oven to 425 degrees (my oven is still a bit hot so I'll probably only go as hi as 400 next time).
Bake it for 20 minutes covered and then 15 minutes uncovered. It should make a hollow sound when you flick it. Plus it's fun to flick!
Then get yourself a generous slice, reheat some of the delicious Borscht you made yesterday and toss three caramelized onion meatballs into the soup. Dinner, my friends, is served.

Super Impressive Things that I Bring Over to Other People's Houses that They Think are Really Hard to Make so I look Incredibly Impressive but Actually They're Sinfully Easy, Ha Ha!
If you don't have this list, promptly make one.
Easy-Peesy No-knead Bread
This cutey-pie little recipe is floating around the internet these days and it leaves a lot of room for creative experimentation! All it takes to pull off is the foresight to mix the ingredients the night before you actually want to eat it.
The night before, in a large bowl, combine:
3 cups flour (1/2-1 cup of which can be whole wheat or spelt, etc) I have been using 1/2 of dark rye flour these days and it's scrumptious.
1-2 tsps salt (the first time I made this I only used 1 and this second time round I used 2 but it seems a bit overly salty so I'll probably do 1 and a bit the next time)
I also added 1/2 cup sesame seeds because I've still got a butt-load of from when I made bagels. You could also use flax seeds. So this is going to be a seedy bread. Yum Yum Yum
Currently my bread is 2 1/2 cups white flour, 1/2 dark rye and 1/4 flax seeds and I'm addicted.
Yeast It's your choice. Either use 1/4 teaspoon Instant Yeast and just throw it in with the dry ingredients or pre-proof 1/2 teaspoon regular yeast in 1/4 cup warm water with a dollop of honey or maple syrup (that's what I do)
Add
1 1/2 cups warm water and stir with a fork till it's all combined. I ended up adding an extra scant 1/4 cup of water because I added the sesame seeds and had too much dry loose stuff hanging out in the bottom of the bowl. Done. Cover and go bed.
Finish tomorrow.
I had some quick oats in my cupboard and the recipe called for a cornmeal coating to keep it from sticking to the pan. I used the cornmeal on round one of this bread but thought I'd switch it up and it worked so so well!!
To bake the bread you prepped last night turn the dough out onto a lightly floured surface. Make your hands a bit wet so the dough doesn't stick to them. Just pull the edges up and push them gently into the centre to make a kind of belly-button on the top of the bread. It really doesn't need to be kneaded.
Then gently put the whole thing in a clean dish towel sprinkled with flour, cornmeal or oats and tuck it in for another 1-2 hours of rising.
 |
| shhhhhhh the breads sleeping! |
With me so far? The bread rose over night and all day, so 9pm-4pm. Then I belly-buttoned it and tossed it in oats. One more rise from 4:30pm-6:30pm ish.
At 6pm put an oven-proof pot with a lid in the oven and preheat the pot and oven to 425 degrees (my oven is still a bit hot so I'll probably only go as hi as 400 next time).
Bake it for 20 minutes covered and then 15 minutes uncovered. It should make a hollow sound when you flick it. Plus it's fun to flick!
Then get yourself a generous slice, reheat some of the delicious Borscht you made yesterday and toss three caramelized onion meatballs into the soup. Dinner, my friends, is served.
Oh Yeah Groceries! And Caramelized Onion Meatballs
Groceries this week were nice and in budget. Thank you cheap and delicious BORSCHT!
$3.01 weekly condiments
$1.29 Can of Tomatoes
$2.50 Ryvita crackers
$2.99 Plain Yogurt
$4.79 Ground Beef
$1.79 Lettuce
$2.61 Cabbage
$1.69 Head of Celery
$2.50 Almond Milk
Usually I make myself choose between milk and yogurt but this week I splurged, haha.
And now that the part for my computer has arrived and I can blog away in the comfort of my own home I'm adding another recipe. Making up for lost time.
I'm making the ground beef I bought into meat balls, some of which I will brown and add to my borscht tonight and some that I will freeze, raw on a cookie sheet and then toss in a bag for later.
1 pound ground beef
2-3 tablespoons water
2 Ryvita crackers crushed into breadcrumbs
A generous handful of fresh parsley
A dash of Cayenne
Salt
And the ingredient that makes this entire recipe worthwhile... drum-roll please...
Caramelized onions. Yum yum yum. I was just going to make my burger/meatball recipe with finely chopped white onion like I usually do but then I remembered how the onion never really cooks as much as I like so this is the solution.
Onions are EXTREMELY easy to caramelize and don't let anyone tell you otherwise.
Just saute some onions (I'm using two medium ones for this recipe) in hot oil till they get a bit brown and soft and translucent. Then add about a cup of water and turn them up to medium high heat. Let the water boil off and then do that again. You can do this two or three times depending on how gloriously shmooshy you want them to be (or how much time you have).
I've used a lot of different recipes for caramelized onions. Ones that include soya sauce, brown sugar, balsamic vinegar. A recipe where they go in the oven and another really annoying one where you spend an hour and a half standing over the stove while the onions cook on low heat, yech! Who has the time?
I like this one because you can pour in the water and step away from the stove. The onions don't burn and it frees you up to do the clean up dishes or have a little dance party around the kitchen table.
Also I'm not going to clean the frying pan right away because it's the one I'll use to brown the meatballs and you KNOW that's going to be good! So there, meatballs for later.
 |
| I would have caramelized them further but I only had so much time to prep-cook during my lunch break! |
Borscht and Broken Computers
Some of you may have noticed that I haven't posted in a while. Well, my computer went all ka-putt and I`m waiting for it to get better. It just needs a little time.
I`m posting this at work during a free period hoping against hope that my computer is better tomorrow or the next day at the latest. The recipes I made last night turned out really well so here goes!

I had a lot of beets left in my fridge from that farmer's market I went to three weeks ago. Beets are great because they don`t go bad very quickly. Unfortunately recipes in my repertoire that use beets include grating them over salads and roasting them with potatoes, onions and garlic. Not very inspired.
The type of beets I've got are sugar beets so they're a very pretty yellow-gold colour and they have an AMAZING flavour (if you`re into that kind of thing).
Turns out Russian Borscht is a really basic soup and all I needed to buy was cabbage and a can of tomatoes. Turns out my repertoire of cabbage recipes is even smaller than that of beets and the broscht only used a quarter of this bad mamma-jamma... a little research and we'll have more cabbage recipes to follow.
Ironically, or coincidentally, or fortuitously? I jumped in a cab with a very friendly driver who was passionate about health, swimming, and cabbage! He suggested boiling it and then pairing it with sauteed onions and apples... I might try it, we'll see.
Anyway back to the Borscht.
Saute until the cabbage is soft
Two onions
1/4 green cabbage
4 or 5 medium potatoes peeled, chopped and washed (I peeled the potatoes this time but I probably won`t the next time I make this soup cause the peels add texture and I like them!)
Add
1 can diced tomatoes
5-6 beets peeled, washed and chopped (I chopped mine the same size as the potatoes but it turns out beets cook more slowly than potatoes - it's that whole "more starch" thing again - so next time I make this I'm going to cut them smaller)
8 cups broth
After the farmer's market, I had quite a few carrots left and since I trim and wash my celery after I buy it I had enough veg to make a pretty delicious broth.
Start all broth (meat or veg) with a mirepoix, which is just a fancy French word for the holy trinity of soups, Onions, Carrots, Celery. Saute a good amount of these (I make sure they cover the bottom of my large pot) in oil until they start to smell delicious. Cover in a quart of water and add whatever vegetable trimmings you've got in your fridge (just make sure they're clean, no one likes a gritty stock). Toss in 6-10 whole pepper corns and some parsley, if you have it. If you've got tomatoes put those in, or greens that need using etc. Really stock is your oyster, so make pearls... or something.
Simmer for 1 hour and then add 1/4 cup of soya sauce. This is my favourite thing to salt-ify soups and sauces with. It gives them a good rich colour and just the right amount of salt to bring out the flavours. Try adding it to gravy next time you make it and you will be amazed!!
For Christmas last year my oldest friend bought me a container with 6 flavoured salts in it. They were originally intended for popcorn but I have been gleefully tossing them into recipes left, right and center (what does that mean?!!) The dill salt tasted sublime in my borscht. Sorry Russians but I couldn't resist putting a little Dukhobor in your beety-borscht.
For everyone who didn't grow up eating creamy, dilly borscht from The Tree House, I`m sorry. Duhkobor Borscht is as different from Russian as Manhattan Clam Chowder is from Boston! Just trust me on this one.
So I made the stock last week and then used it in my borscht this week. I finished the soup before yoga and had a delicious and nutritiously comforting meal waiting for me when I returned.
I garnished the finished product with a dollop of plain yogurt and some fresh parsley.
Pretty and hearty.
I`m posting this at work during a free period hoping against hope that my computer is better tomorrow or the next day at the latest. The recipes I made last night turned out really well so here goes!
I had a lot of beets left in my fridge from that farmer's market I went to three weeks ago. Beets are great because they don`t go bad very quickly. Unfortunately recipes in my repertoire that use beets include grating them over salads and roasting them with potatoes, onions and garlic. Not very inspired.
The type of beets I've got are sugar beets so they're a very pretty yellow-gold colour and they have an AMAZING flavour (if you`re into that kind of thing).
Turns out Russian Borscht is a really basic soup and all I needed to buy was cabbage and a can of tomatoes. Turns out my repertoire of cabbage recipes is even smaller than that of beets and the broscht only used a quarter of this bad mamma-jamma... a little research and we'll have more cabbage recipes to follow.
Ironically, or coincidentally, or fortuitously? I jumped in a cab with a very friendly driver who was passionate about health, swimming, and cabbage! He suggested boiling it and then pairing it with sauteed onions and apples... I might try it, we'll see.
Anyway back to the Borscht.
Saute until the cabbage is soft
Two onions
1/4 green cabbage
4 or 5 medium potatoes peeled, chopped and washed (I peeled the potatoes this time but I probably won`t the next time I make this soup cause the peels add texture and I like them!)
Add
1 can diced tomatoes
5-6 beets peeled, washed and chopped (I chopped mine the same size as the potatoes but it turns out beets cook more slowly than potatoes - it's that whole "more starch" thing again - so next time I make this I'm going to cut them smaller)
8 cups broth
After the farmer's market, I had quite a few carrots left and since I trim and wash my celery after I buy it I had enough veg to make a pretty delicious broth.
Start all broth (meat or veg) with a mirepoix, which is just a fancy French word for the holy trinity of soups, Onions, Carrots, Celery. Saute a good amount of these (I make sure they cover the bottom of my large pot) in oil until they start to smell delicious. Cover in a quart of water and add whatever vegetable trimmings you've got in your fridge (just make sure they're clean, no one likes a gritty stock). Toss in 6-10 whole pepper corns and some parsley, if you have it. If you've got tomatoes put those in, or greens that need using etc. Really stock is your oyster, so make pearls... or something.
Simmer for 1 hour and then add 1/4 cup of soya sauce. This is my favourite thing to salt-ify soups and sauces with. It gives them a good rich colour and just the right amount of salt to bring out the flavours. Try adding it to gravy next time you make it and you will be amazed!!
For Christmas last year my oldest friend bought me a container with 6 flavoured salts in it. They were originally intended for popcorn but I have been gleefully tossing them into recipes left, right and center (what does that mean?!!) The dill salt tasted sublime in my borscht. Sorry Russians but I couldn't resist putting a little Dukhobor in your beety-borscht.
For everyone who didn't grow up eating creamy, dilly borscht from The Tree House, I`m sorry. Duhkobor Borscht is as different from Russian as Manhattan Clam Chowder is from Boston! Just trust me on this one.
So I made the stock last week and then used it in my borscht this week. I finished the soup before yoga and had a delicious and nutritiously comforting meal waiting for me when I returned.
I garnished the finished product with a dollop of plain yogurt and some fresh parsley.
Pretty and hearty.
Sunday, 16 October 2011
Best Dinner EVER & Groceries #2
Dinner tonight: Lemon Dijon Pork Burgers with Home Cut Spicy Fries and Green Salad. Drool drool drool.

But before the fun stuff let's get the money business out of the way.
I bought:
Farmer's Market Veggies $8
Ground Pork $3.71
Two Tomatoes $1.77
Local Apples $2.61
Red Leaf Lettuce $1.79
Fresh Parsley $1.59
1 Can Chickpeas $0.99
1 Packet of bread yeast $0.66
Flour $1.00
Total $22.12
Plus my carry over condiments $3.46
Total's total $25.58
Now. Onto the BEST DINNER EVER!!
I used half the amount of pork I bought and it made 3 large burger patties.
I put in them:
1 egg (still have a few from the last 2 weeks)
2 generous handfuls of chopped fresh parsely
1 heaping tsp of grainy mustard
1/2 a white onion, finally diced
Dash of lemon juice
Salt and pepper
But the mixture was much much too soupy so what did I add in lieu of bread crumbs? You guessed it! Cornmeal. My favourite pantry item (shhhhh don't tell the rest of the pantry!!)
 Once I'd mixed all this up I put a pot of water on to boil and chopped up my potatoes in fry shaped pieces.
Now, when making fries from scratch in the oven remember that sweet potatoes have a lower starch content than regular potatoes so they don't need to be blanched first. They can just be tossed with oil and spices and put in the oven. Potato potatoes need to be blanched first.
Bring salted water to a rolling boil and drop in your taters. Turn the water down to medium high and boil for 5 minutes. No more no less. Drain and rinse. Toss the "fries" in oil, salt and cayenne pepper and painstakingly lay them out, EVENLY spaced, on a cookie sheet.
Put them in a 425 degree oven for ten minutes. Now here comes the finicky part. You gotta flip each one over after 10 minutes. Don't just toss the pan around and hope that all of them flipped cause believe me they didn't. Flipping them by hand (well okay, with a fork cause of the burning hot oil) is WELL worth the effort.
Leave them in for another 10-ish minutes. It behooves you to check them quite regularly they are wont to burn if you're not careful.
The burgers go into a medium to medium high frying pan with a bit of oil. In order to keep any type of burger from puffing up in the middle and looking like a large meatball put a small divot in the centre when you're forming them.
Cook for roughly 6 minutes on each side. Mine weren't quite done all the way through at this point so I turned the pan down and cooked them covered, on low for few minutes.
I love lazy weekends at home because I have time to do all my food prep and planning. This weekend I made bread (which I haven't blogged about yet because I'm still tweaking the recipe, maybe next week...), hummus and I also washed all my lettuce and cut my carrots into carrot sticks.
Here's a little secret about me. I love vegetables but I hate having to prep them. I hate washing lettuce and I never peel carrots. Having to wash lettuce before making a salad can actually make me go without salad that day. So lazy.
I would buy pre-washed baby greens but they are much more expensive than a simple head all by its onesies (if you're wondering how that word is pronounced it goes One-zeeies).
So I washed all my lettuce and put it back in the bag with the little holes that it came in. I also washed and cut up my remaining carrots. When I buy celery I wash and cut it up too. Both go into a large container filled with cold water in my fridge. If I didn't do this I would never eat them. Sad but true.
So my fries turned out perfectly, the burger was flavourful and tender and it tasted divine on two slices of freshly baked bread. Who needs burger buns!
I was a good little eater and made salad. I turned my fresh batch of hummus into salad dressing by thinning it out and the leftover burgers will make a great lunch and/or dinner in the next few days.
So good.

But before the fun stuff let's get the money business out of the way.
I bought:
Farmer's Market Veggies $8
Ground Pork $3.71
Two Tomatoes $1.77
Local Apples $2.61
Red Leaf Lettuce $1.79
Fresh Parsley $1.59
1 Can Chickpeas $0.99
1 Packet of bread yeast $0.66
Flour $1.00
Total $22.12
Plus my carry over condiments $3.46
Total's total $25.58
Now. Onto the BEST DINNER EVER!!
I used half the amount of pork I bought and it made 3 large burger patties.
I put in them:
1 egg (still have a few from the last 2 weeks)
2 generous handfuls of chopped fresh parsely
1 heaping tsp of grainy mustard
1/2 a white onion, finally diced
Dash of lemon juice
Salt and pepper
But the mixture was much much too soupy so what did I add in lieu of bread crumbs? You guessed it! Cornmeal. My favourite pantry item (shhhhh don't tell the rest of the pantry!!)

Now, when making fries from scratch in the oven remember that sweet potatoes have a lower starch content than regular potatoes so they don't need to be blanched first. They can just be tossed with oil and spices and put in the oven. Potato potatoes need to be blanched first.
Bring salted water to a rolling boil and drop in your taters. Turn the water down to medium high and boil for 5 minutes. No more no less. Drain and rinse. Toss the "fries" in oil, salt and cayenne pepper and painstakingly lay them out, EVENLY spaced, on a cookie sheet.
Put them in a 425 degree oven for ten minutes. Now here comes the finicky part. You gotta flip each one over after 10 minutes. Don't just toss the pan around and hope that all of them flipped cause believe me they didn't. Flipping them by hand (well okay, with a fork cause of the burning hot oil) is WELL worth the effort.
Leave them in for another 10-ish minutes. It behooves you to check them quite regularly they are wont to burn if you're not careful.
The burgers go into a medium to medium high frying pan with a bit of oil. In order to keep any type of burger from puffing up in the middle and looking like a large meatball put a small divot in the centre when you're forming them.
Cook for roughly 6 minutes on each side. Mine weren't quite done all the way through at this point so I turned the pan down and cooked them covered, on low for few minutes.
I love lazy weekends at home because I have time to do all my food prep and planning. This weekend I made bread (which I haven't blogged about yet because I'm still tweaking the recipe, maybe next week...), hummus and I also washed all my lettuce and cut my carrots into carrot sticks.
Here's a little secret about me. I love vegetables but I hate having to prep them. I hate washing lettuce and I never peel carrots. Having to wash lettuce before making a salad can actually make me go without salad that day. So lazy.
I would buy pre-washed baby greens but they are much more expensive than a simple head all by its onesies (if you're wondering how that word is pronounced it goes One-zeeies).
So I washed all my lettuce and put it back in the bag with the little holes that it came in. I also washed and cut up my remaining carrots. When I buy celery I wash and cut it up too. Both go into a large container filled with cold water in my fridge. If I didn't do this I would never eat them. Sad but true.
So my fries turned out perfectly, the burger was flavourful and tender and it tasted divine on two slices of freshly baked bread. Who needs burger buns!
I was a good little eater and made salad. I turned my fresh batch of hummus into salad dressing by thinning it out and the leftover burgers will make a great lunch and/or dinner in the next few days.
So good.
Saturday, 15 October 2011
Weekend Breakfast
So here's a lovely little twist on what I eat for breakfast every damn morning.
A soft boiled egg on toast.
The perfect way to soft boil an egg is to bring it up to a boil and then turn it down to 2 for 5-6 minutes depending on the size of the egg.
But this isn't what I made this morning. I had a little extra time so what I made was a polenta pancake with a poached egg.
I buttered my hands and molded some cold leftover polenta into a ball, then shmooshed it into a little pancake about 3-4 inches in diameter.

Put about 1/2 an inch of oil in the bottomn a small frying pan on medium high heat. To make sure that frying oil is the right temperature sprinkle a tiny amount of water onto the oil and if it pops and sizzles you're good to go. I learned that little trick from the book Water for Chocolate which you should read in one steamy hot summer day with a pitcher of sangria.
Okay back to the frying. While the oil is heating, bring a small pot of water to boil. There are lots of tips on poaching eggs and the general wisdom is to add a little vinegar into the water. I don't like the taste and I've never had much trouble with poached eggs sans vinegar.
Just bring the water to a rolling, happy little boil and then crack in the egg. Use Julia Child's advice and with a shallow spoon scoop some of the water from under the egg onto the top of the egg and visualize the shape of a poached egg. Okay so the "visualize" part is all me and but I find it helps. Oh and as a final note, any advice Julia Child gives in the kitchen take at face value. She is very wise.
Put the little pancake into the hot oil and try not to let it spatter all over you. I recommend cooking this dish in long sleeves and not skimpy little pjs... just sound advice and not speaking from experience... haha
When the pancake is all crispy and golden - I'm assuming you've had the wherewithal to flip the damn thing at this point - put it onto a folded piece of paper towel.
The poached egg takes less time than a soft boiled one, so leave it in the water for only 3-ish minutes. I also put the egg onto folded paper towel because I cannot STAND it when a poached egg makes the toast all soggy. Blech!!
Once it is suitably dry plop it onto your polenta pancake and salt and pepper the lot. So yummy!!!


Friday, 14 October 2011
Two Sides of the Coffee Cup and Roasted Garlic Potato Leek Soup
So you know how I stopped drinking coffee for about a minute? Well that died. I spent one short week at work decaffeinated and realized that my job requires a rather high degree of patience something I was very short on during this brief stint. Plus the stuff is frigging delicious and I missed it. So I'm back. Once again I am nice to the people I work with and happier about life in general. You steaming little cup of goodness, you!
On another note, yesterday I frolicked at a farmer's market and spent some of my budget for the next two weeks. Farmer`s Markets are magical little places especially in harvest season. I got 2 leeks, some sugar beets, and a bunch of enormous and sweet carrots for about $5. I also picked up 5 pounds of potatoes at my local grocery store for $3. So last night I made Potato Leek Soup!
Clean the leeks: Pull of the tough outer layers, chop off the rough green bits and throw them aside (but not away), cut the remaining stems lengthwise and then in 1 inch half rounds. Immerse all the bits in cold water. This is the best way to get any remaining soil out of the layers.
Sauté the leeks in oil until they're soft and smell intoxicating.
Add some garlic (I added 4 cloves at this point but you will see that I add more at the end, oh how I love GARLIC)
Put in some peeled, cut up potatoes and I threw in a couple carrots because I have so many and they add a nice sweetness to this soup though the orangeness makes the dish a slightly off-putting colour... I'm not going to lie before it was completely pureed it strongly resembled vomit...
Cover the whole mess with water and bring to a boil. You will also want to put in generous portions of both salt and pepper and then probably add more after you puree.
Once the potatoes are soft turn off the soup and go to yoga class!
Well okay, that's what I did. You can if you want to but you could also do something else while the soup cools enough to puree. Like hunt rabbits or do a little dance, make a little love... really whatever you're in the mood for.
When I got home I set to pureeing. Since I was nice and tired from work and all that pretzeling I decided to use my food processor first, have it leak (or is it Leek? haha sorry) all over the counter and then switch to the blender. I like to make extra dishes for myself. Doing dishes is zen... grrrrarghblech OH NO!! Being my response to soup all over the everywhere!
Two hours of relaxation efficiently nullified.
That said I was glad to have something warm to eat once I got home. And then came the tasting once pureed and seasoning adjusting. Oh it was so bland!!! I couldn't STAND it... so I added a whole bunch of fresh cracked pepper and then it was bland and overly peppery. Damn it.
Solution? Roast an entire head of garlic, (in a square of tinfoil with the top cut off, drizzle the head with oil and cook fro 40mins at 425. When I put mine in a cold oven and left it in for 40mins while the oven heated up it worked just grand!) mashed up with a fork and stirred it into the soup.
Solved!!! And I had so much soup that I put three containers in my freezer with enough for dinner that night and at least two lunches in my fridge.
I'm so glad it's raining cause all I want on a rainy fall day is nice warm garlicky soup!!
 |
| Me enjoying my first, LARGE cup of coffee after a week. Absence does make the heart grow fonder. |
Clean the leeks: Pull of the tough outer layers, chop off the rough green bits and throw them aside (but not away), cut the remaining stems lengthwise and then in 1 inch half rounds. Immerse all the bits in cold water. This is the best way to get any remaining soil out of the layers.
Sauté the leeks in oil until they're soft and smell intoxicating.
Add some garlic (I added 4 cloves at this point but you will see that I add more at the end, oh how I love GARLIC)
Put in some peeled, cut up potatoes and I threw in a couple carrots because I have so many and they add a nice sweetness to this soup though the orangeness makes the dish a slightly off-putting colour... I'm not going to lie before it was completely pureed it strongly resembled vomit...
Cover the whole mess with water and bring to a boil. You will also want to put in generous portions of both salt and pepper and then probably add more after you puree.
Once the potatoes are soft turn off the soup and go to yoga class!
Well okay, that's what I did. You can if you want to but you could also do something else while the soup cools enough to puree. Like hunt rabbits or do a little dance, make a little love... really whatever you're in the mood for.
When I got home I set to pureeing. Since I was nice and tired from work and all that pretzeling I decided to use my food processor first, have it leak (or is it Leek? haha sorry) all over the counter and then switch to the blender. I like to make extra dishes for myself. Doing dishes is zen... grrrrarghblech OH NO!! Being my response to soup all over the everywhere!
Two hours of relaxation efficiently nullified.
That said I was glad to have something warm to eat once I got home. And then came the tasting once pureed and seasoning adjusting. Oh it was so bland!!! I couldn't STAND it... so I added a whole bunch of fresh cracked pepper and then it was bland and overly peppery. Damn it.
Solution? Roast an entire head of garlic, (in a square of tinfoil with the top cut off, drizzle the head with oil and cook fro 40mins at 425. When I put mine in a cold oven and left it in for 40mins while the oven heated up it worked just grand!) mashed up with a fork and stirred it into the soup.
Solved!!! And I had so much soup that I put three containers in my freezer with enough for dinner that night and at least two lunches in my fridge.
I'm so glad it's raining cause all I want on a rainy fall day is nice warm garlicky soup!!
Wednesday, 12 October 2011
Bad blogger, bad!
Sorry I've been so awol lately. I was off eating Canadian Thanksgiving with Americans.
The good news is that I had two chances to master a DELICIOUS pumpkin pie!!
The first one was burnt burnt burnt. Okay so maybe I cooked it in a deep bowl type dish so the custard didn't set (at first) and then when I left it in for ten minutes I may or may not have fallen asleep on my friends couch in the oven warmed apartment and a shaft of friendly fall sunshine... it was charred beyond belief. My gorgeous friends all happily scraped the pumpkin custard from shiny black wedges that used to be tasty nut crust... oh well.
Okay Pumpkin Pie. I know that every single food blog and recipe book says to use pie pumpkin and not jack'o'lanterns (something about jack'o's being grown for cattle...) but COME ON they are so much CHEAPER. I say moo baby, moo!
One of my lovely friend-types can't eat The Gluten so this recipe is a nut crust. Turns out though that nut flavour goes so well with the pumpkin that I might just make this crust from now on!
In the spirit of my budget the ingredients for the two pies were provided by my friends in exchange for pie making abilities and left over pumpkin in their freezers. The jack'o'lantern only cost $2 and made both pies, no problem!
1 cup unsweetened coconut
1 cup walnuts (or whatever unsalted nut you feel like, walnuts are delicious and they were the cheapest)
3/4 cup packed brown sugar
1/2 buckwheat flour (I used whole wheat flour in the second pie cause that group was gluten friendly)
1 tsp cinnamon
Buzz all this deliciousness in a blender or food processor. The food processor works better cause the blender has a tendency to make the nuts into nut butter but it still does the super, crushing, mixy job.
Cut 5 tablespoons of butter or margarine or solid coconut oil into the crust and press the whole mess into a greased spring form pan.
What does cutting butter or margarine or solid coconut oil into a crust look like? Well let me tell you.
You could buy a pastry cutter (I have one) or you could use two knives in a sliding slicing motion (does that make sense?) basically you just don't want to use your hot hot hands to work the butter into the nut mixture cause it makes the butter melt and then the pastry gets a bit tough. If your food processor is big just pulse the butter in there.
Bake at 350 for about 7 minutes, maybe 7 and 3/4
Now the filling! This is the extremely economical part cause one jack'o'lantern should make two pies and delicious freezable leftovers (think pumpkin soup, pumpkin bread, muffins, cubes of pumpkin all hot and dripping with butter, salt, and pepper, mmmmmm)
The fastest way to break down a pumpkin is to wash the outside, quarter it, scoop out the seeds and steam it in a large pot. Steaming pumpkin takes about 20 minutes but it washes out the flavour a bit. Roasting (quarter and toss into large roasting pan at 450) takes about 45 minutes. Do whichever you have time for but double the spices in the filling if you're steaming.


Cube and freeze what's leftover.
The easiest way to get the rind off the cooked pumpy-poo (I got sick of writing the actual word) is to make strip cuts about an inch long into the pieces of pumpkin and then ones going across those. The only thing to remember is to pierce the skin going in only one direction. When its in cube loosened strips then you can easily run the knife between the flesh and the rind. Et VOILA! Cubed pumpkin for eating in joy.
You need 3 cups of cooked pumpkin for this recipe
1 cup milk (I used almond in one and 1/2 whip cream and 1/2 milk in the other)
Grate a nub, vaguely thumbnail sized, of fresh ginger (not a lot of recipes call for fresh ginger but I'm kind of addicted to it and the zingy heat turns this bad boy into a pretty sexy dessert)
1/4 tsp nutmeg
1 tsp cinnamon
1 tsp vanilla
2 eggs
Whooge this in a blender or food processor or whip by hand but remember to whip with fervour.
Bake for 15 mins at 450 and then turn the oven down to 350 and bake for another 45mins.
Yum yum yum pumpkin pie gives me happy dancing food feet. For the record happy dancing food feet are when my feet dance of their own accord when I am eating delicious food. It really can't be stopped.
The good news is that I had two chances to master a DELICIOUS pumpkin pie!!
The first one was burnt burnt burnt. Okay so maybe I cooked it in a deep bowl type dish so the custard didn't set (at first) and then when I left it in for ten minutes I may or may not have fallen asleep on my friends couch in the oven warmed apartment and a shaft of friendly fall sunshine... it was charred beyond belief. My gorgeous friends all happily scraped the pumpkin custard from shiny black wedges that used to be tasty nut crust... oh well.
Okay Pumpkin Pie. I know that every single food blog and recipe book says to use pie pumpkin and not jack'o'lanterns (something about jack'o's being grown for cattle...) but COME ON they are so much CHEAPER. I say moo baby, moo!
One of my lovely friend-types can't eat The Gluten so this recipe is a nut crust. Turns out though that nut flavour goes so well with the pumpkin that I might just make this crust from now on!
In the spirit of my budget the ingredients for the two pies were provided by my friends in exchange for pie making abilities and left over pumpkin in their freezers. The jack'o'lantern only cost $2 and made both pies, no problem!
1 cup unsweetened coconut
1 cup walnuts (or whatever unsalted nut you feel like, walnuts are delicious and they were the cheapest)
3/4 cup packed brown sugar
1/2 buckwheat flour (I used whole wheat flour in the second pie cause that group was gluten friendly)
1 tsp cinnamon
Buzz all this deliciousness in a blender or food processor. The food processor works better cause the blender has a tendency to make the nuts into nut butter but it still does the super, crushing, mixy job.
Cut 5 tablespoons of butter or margarine or solid coconut oil into the crust and press the whole mess into a greased spring form pan.
What does cutting butter or margarine or solid coconut oil into a crust look like? Well let me tell you.
You could buy a pastry cutter (I have one) or you could use two knives in a sliding slicing motion (does that make sense?) basically you just don't want to use your hot hot hands to work the butter into the nut mixture cause it makes the butter melt and then the pastry gets a bit tough. If your food processor is big just pulse the butter in there.
Bake at 350 for about 7 minutes, maybe 7 and 3/4
Now the filling! This is the extremely economical part cause one jack'o'lantern should make two pies and delicious freezable leftovers (think pumpkin soup, pumpkin bread, muffins, cubes of pumpkin all hot and dripping with butter, salt, and pepper, mmmmmm)
The fastest way to break down a pumpkin is to wash the outside, quarter it, scoop out the seeds and steam it in a large pot. Steaming pumpkin takes about 20 minutes but it washes out the flavour a bit. Roasting (quarter and toss into large roasting pan at 450) takes about 45 minutes. Do whichever you have time for but double the spices in the filling if you're steaming.
The easiest way to get the rind off the cooked pumpy-poo (I got sick of writing the actual word) is to make strip cuts about an inch long into the pieces of pumpkin and then ones going across those. The only thing to remember is to pierce the skin going in only one direction. When its in cube loosened strips then you can easily run the knife between the flesh and the rind. Et VOILA! Cubed pumpkin for eating in joy.
You need 3 cups of cooked pumpkin for this recipe
1 cup milk (I used almond in one and 1/2 whip cream and 1/2 milk in the other)
Grate a nub, vaguely thumbnail sized, of fresh ginger (not a lot of recipes call for fresh ginger but I'm kind of addicted to it and the zingy heat turns this bad boy into a pretty sexy dessert)
1/4 tsp nutmeg
1 tsp cinnamon
1 tsp vanilla
2 eggs
Whooge this in a blender or food processor or whip by hand but remember to whip with fervour.
Bake for 15 mins at 450 and then turn the oven down to 350 and bake for another 45mins.
 |
| Is that I finger mark I see? Greedy friends swiping licks!! |
 |
| I really should have taken pictures of the pie before it got almost completely eaten but I was too busy eating it!! |
Tuesday, 4 October 2011
Day 5 Professional Snack-idge
Today was another not seriously cooking day. I defrosted a serving of the pasta sauce I made on Day 1 and made enough polenta for dinner tonight and lunch tomorrow.
What I did make was popcorn. Delicious stove-top popped, old fashioned popcorn. The one ingredient I ALWAYS have on hand because of popcorn is Nutritional Yeast. That's right, nutritional yeast. It can also be called engevita yeast and my friends called it that weird hippy dust for years until I converted them all to popcorn this way:
In a large-ish pot pour a generous dollop of oil and three kernels of pop corn. Put the lid on the pot and the pot on medium high heat.
Wait until you hear all three kernels pop and then add 1/4 cup popcorn. Toss the popcorn around in the hot oil for a few seconds and then return to the heat.
KEEP THE POT MOVING!!! This is very important otherwise you get little burnt black rocks in the bottom your pot instead of delicious popcorn.
Open the lid a crack every once in a while to let steam out otherwise your popcorn will have the texture of stale crackers.
Once the popping slows down take off the heat and let sit for about the amount of time it takes to get a bowl out of the cupboard.
Pour popcorn into a bowl and drizzle a bit more oil on it then evenly sprinkle nutritional yeast and salt onto the popcorn.
You could also add curry powder, cayenne, soya sauce (mix it in with the oil before pouring the extra on at the end otherwise the soya sauce makes the kernels super soggy), Parmesan cheese or spike. All of these things make delicious popcorn so much more delicious.
Please don't put all those seasonings onto one bowl of popcorn...
I also whipped up a tasty dip for my veggies that I took to lunch. One heaping teaspoon of mayonnaise, one of plain yogurt, salt and pepper and a dash of curry powder. Just make it in the morning before lunch otherwise the spices in the curry powder don't have time to rehydrate and it ends up bland and oddly grainy.
Enjoy!!
Monday, 3 October 2011
Day 4 Leftovers
So it would seem that I have a cold. It crept up on me!! What with the constant caffeine withdrawal that started on Saturday I didn't realize I was sick until I was waking up in the middle of the night to blow my nose.... over share?
The point of this little segue into my health is that I didn't feel like cooking tonight. The plan was to eat leftover stir fry from last night with rice. Instead I turned the leftover stir fry into Sesame Chili soup. So comforting and the chili really helps with the sinuses.
 I just put 2 tablespoons soya sauce and 1 tablespoon of sesame seeds into about a pint of water. I added a little cayenne and a tiny dash of honey. I brought that up to a boil and then added the leftover stir fry.
The stir fry was that half a zucchini, some peppers, garlic and onions and two of the chicken sausages.
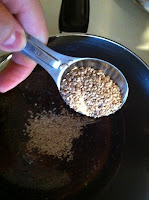 I also threw in 1 cup of cooked brown rice.
The soup was pretty good. Not amazing but edible and comforting with in it's warm soupiness. I also ate a toasted bagel. I don't have butter in my budget these first two weeks so I drizzled the bagel with canola oil and sprinkled a little salt on it.
 I'ma curl up on the couch with my book now. Perhaps something more inspiring will happen tomorrow.
The point of this little segue into my health is that I didn't feel like cooking tonight. The plan was to eat leftover stir fry from last night with rice. Instead I turned the leftover stir fry into Sesame Chili soup. So comforting and the chili really helps with the sinuses.
I just put 2 tablespoons soya sauce and 1 tablespoon of sesame seeds into about a pint of water. I added a little cayenne and a tiny dash of honey. I brought that up to a boil and then added the leftover stir fry.The stir fry was that half a zucchini, some peppers, garlic and onions and two of the chicken sausages.
I also threw in 1 cup of cooked brown rice.The soup was pretty good. Not amazing but edible and comforting with in it's warm soupiness. I also ate a toasted bagel. I don't have butter in my budget these first two weeks so I drizzled the bagel with canola oil and sprinkled a little salt on it.
Sunday, 2 October 2011
Day 3 Groceries
I just spent 2 hours in the library and another 1 hour in the grocery store with a calculator and I officially figured out the first 2 week budget!! I am very much hoping that it won't take this long each time... stupid math.
Also I may be grocery shopping on a budget but there are three things I don't compromise on.
1. When shopping for eggs it goes first choice local small farm, second choice free range, third choice (when I'm feeling all fancy and lush) free range organic. Luckily my store sells cheap local eggs.
2. Then there's peanut butter. I always buy organic because of something scary someone told me once about using peanut plants to clean up toxic waste and then still using the first crop of peanuts for eating, yech.
3. I do my damndest to buy my meat products like my eggs.
The first part of my list is items that I won't use in two weeks but over the entire 13 week period so their cost will be divided by 6 and subtracted from the $25 bi-weekly allowance:
Mayonnaise $6.29/6 = $1.04
Grainy Mustard $2.49 = $0.42
Soya Sauce $2.28/6 = $0.38
Sesame Seeds $3.75/6 = $0.63
Organic Peanut Butter $3.87 = $0.64
Lemon Juice Concentrate $1.89 = $0.32
Total $3.43
Groceries
Lettuce $1.99
1 Yellow Pepper $1.76
1 Green Pepper $0.55
1 Large Zucchini $1
Celery $2.69
Yogurt Plain $2.99
Local Eggs $2.06
Local Chicken Sausages $3.78
1 Can Diced Tomatoes $0.99
1 Can Tomato Paste $0.66
1 Can Chickpeas $0.99
Flour $1
One Yeast Packet $0.66
Total $24.56
Awesome sauce.
And so this post isn't too horrifically boring (dolla' dolla' bills y'all) I also made hummus today.
Hummus
In a food processor combine:
1 large can Chickpeas - rinse them in a colander over the sink first
2-3 cloves of garlic - I don't own a garlic press and use finely chopping garlic as an excuse to practice my chopping skills.
1 teaspoon cummin
2 tablespoons warm water
1 tablespoon lemon juice
Salt and Pepper
Buzz this stuff a bit till it's kind of a course meal texture then gradually add some oil while it running until the hummus reaches the right consistency.
What is the right consistency, you might ask? Smooth not grainy but don't add so much oil that it seperates. Just add some, look at it, taste, add some more, whuge the food processor, maybe add some more, taste it again, adjust the seasoning, etc.
You could also put some cayenne in here if you want to turn up the heat or roast the garlic in the oven at 400 for a little more than 30 minutes in a piece of tinfoil with oil for an even fancier hummus experience.
Enjoy!!!
Saturday, 1 October 2011
Day 2 Argh blergh feffingrump grump grump
Hmmmm so my budget doesn't include coffee... I've been meaning to ween myself of the jitter-juice basically since I started drinking it 4 years ago. Day 1 of no coffee = grumpy headachey Holly, sigh
I'm taking my frustrations out on Bagel dough. I've been craving Montreal style bagels ever since I moved and so I've decided to attempt my own.
This is also spurred on by the fact that the awesome, weird little health food, Chinese fast food (NO MSG!!), bakery near my house sells flour in bulk for $0.20/100g. I bought a dollar's worth and made 8 bagels. Boom!!
I also bought a bag of sesame seeds to garnish these bad daddies, 332g $3.75!
I used a recipe I found on epicurious.com but skipped the last 1-2 days of rising step because their recipe is for New York style bagels and I wanted Montreal style which are less puffy. For the second rising I did 30 minutes pre-poach. I also don't have any parchment paper to line my trays with so I've greased them and I'm going to dip the post-poached bagels into a tiny bit of cornmeal (ain't it just the most useful thing?). Hopefully this will keep them from sticking.
Okay so it turns out dipping slippery, wet, boiling hot bagels into cornmeal and then transferring them to a pan is an infuriating task. I did four like that and then for the second four I sprinkled the cornmeal directly onto the baking pan before putting the bagels down, so much simpler.
Also my kitchen seems to have misplaced it's slotted spoon... I bet it ran off with the handle to my large pot, the slot (this being an attempt at a pun with slut)! Anyway there may be a couple small puddles on my baking sheets.
Note for future bagel attemptees, slotted spoons should be found before the bagels go into the poaching liquid. Ah well next time.
Ah Ah AH!! Smoke detector!! Oh ugh the cornmeal on the stupid pan is stupid burning!!
I so badly want a cup of coffee right now, you have NO idea.
Ooh they're so pretty! And okay billows of dark smoke aside they're not stuck to the pan so maybe I am a culinary genius after all. A cold culinary genius with every window and door in her apartment open.

First bite, SUCCESS!! So yummy I could eat all eight right now, but I won't. That would defeat the purpose of meal planning on the cheap.
They are a little puffier than the Montreal ones I've been craving and I think next time I would make 12 out of the recipe instead of eight. They seem kind of unnecassarily large. But I'm happy with the result and DEFINITELY making these again.
Lalalelala caffeine withdrawal headache almost gone or at least kind of forgotten.
I'm taking my frustrations out on Bagel dough. I've been craving Montreal style bagels ever since I moved and so I've decided to attempt my own.
 |
| Pre bagel shaping counter pounding |
I also bought a bag of sesame seeds to garnish these bad daddies, 332g $3.75!
I used a recipe I found on epicurious.com but skipped the last 1-2 days of rising step because their recipe is for New York style bagels and I wanted Montreal style which are less puffy. For the second rising I did 30 minutes pre-poach. I also don't have any parchment paper to line my trays with so I've greased them and I'm going to dip the post-poached bagels into a tiny bit of cornmeal (ain't it just the most useful thing?). Hopefully this will keep them from sticking.
Okay so it turns out dipping slippery, wet, boiling hot bagels into cornmeal and then transferring them to a pan is an infuriating task. I did four like that and then for the second four I sprinkled the cornmeal directly onto the baking pan before putting the bagels down, so much simpler.
Also my kitchen seems to have misplaced it's slotted spoon... I bet it ran off with the handle to my large pot, the slot (this being an attempt at a pun with slut)! Anyway there may be a couple small puddles on my baking sheets.
Note for future bagel attemptees, slotted spoons should be found before the bagels go into the poaching liquid. Ah well next time.
Ah Ah AH!! Smoke detector!! Oh ugh the cornmeal on the stupid pan is stupid burning!!
I so badly want a cup of coffee right now, you have NO idea.
Ooh they're so pretty! And okay billows of dark smoke aside they're not stuck to the pan so maybe I am a culinary genius after all. A cold culinary genius with every window and door in her apartment open.

First bite, SUCCESS!! So yummy I could eat all eight right now, but I won't. That would defeat the purpose of meal planning on the cheap.
They are a little puffier than the Montreal ones I've been craving and I think next time I would make 12 out of the recipe instead of eight. They seem kind of unnecassarily large. But I'm happy with the result and DEFINITELY making these again.
Lalalelala caffeine withdrawal headache almost gone or at least kind of forgotten.
Friday, 30 September 2011
Day 1 Oh God I have no money!
I just started a new job.
Therefore, I have started a new budget. And it. Is. Grim.
Consequently I have issued myself this possibly impossible (ha), possibly infuriating, possibly delicious (possibly not) little challenge.
It is 13 weeks till I fly fly away to my parent's house for Christmas break which also means I fly to a fully stocked fridge and pantry. Until then my pantry has 13 items in it and I'm only allowed to spend $25 every two weeks for extra food.
13 items, 13 weeks, $172.50
Challenge accepted!
Day 1 Spaghetti and polenta
I made the sauce which is definitely healthier and probably more delicious than the store bought stuff. It works out to about the same price.
Adding to my pantry items I bought:
1 large can of diced tomatoes $0.99
1 small can of tomato paste $0.66
1 zucchini's $1 - I used half. It's really quite large.
1 yellow pepper $1.76 - On sale!
1 package of locally made chicken sausages $3.78 (8 in the package, I used 4).
Slice the sausages and saute in a large large very large saucepan. Once they're cooked remove from the pan and saute 2 onions, 1 yellow pepper and 4 cloves of garlic in the yummy sausage drippings.
When the veggies are all soft and delicious add half a large grated zucchini, the can of diced tomatoes, tomato paste, 2-ish teaspoons salt, 2 teaspoons dried basil, some cayenne and let simmer until some of the diced tomato liquid is gone.
Here's my big secret. I pocket little packages of honey from the cafeteria at work. Honey is expensive but I love it. Whatever, they're complimentary!
Add one pilfered honey packet to the simmering spaghetti goodness. Sugar, honey etc is important in homemade spaghetti sauce because tomatoes are so acidic. If your cafeteria doesn't have honey then feel free to use white sugar (I would caution against trying surgarmate... that stuff is gross)!
When as much liquid as you think is good is gone add the sausage back in, et voila!!! Spaghetti Sauce!!!!!!!!! Cheap cheap cheap. Lots of vegetables and WAY too much for one person to eat for one dinner. I'm freezing 3/4 of what I've got into those half size yogurt containers because that's the perfect amount to defrost for one person. This leaves me with enough for dinner tonight and I'll most likely stretch the last quarter into lunch tomorrow.
Polenta, 2 portions
1 cup water, bring to boil, reduce heat
1/2 cornmeal, pour into the boiling water while stirring. STIR AND POUR PEOPLE, STIR AND POUR!!! If you don't, it gets lumpy. The lumps are hard to get out. Tonight mine is lumpy because I'm working on this post and watching an episode of Buffy.
Multi-tasking = lumpy polenta. I'm okay with it, you shouldn't be.
A chef friend of mine, who will remain unnamed, once said that most people eat undercooked cornmeal (ie polenta). I am therefore cooking mine uber slowly over low-ish heat while I post. Gives me more time to work the lumps out too.
Salt and pepper at will.
Cost?
$5.80
What do I get?
4 dinners worth of spaghetti sauce
2 meals worth of polenta
Leftover?
1/2 a zucchini
4 chicken sausages
To use at a later date. Awesome.
Subscribe to:
Posts (Atom)