I love pudding. Any kind. It's all miraculously delicious in my book. I even tried black pudding not too long ago from a fancy-type restaurant and thought it was SUMPTIOUS! For those of you who aren't aware, Black Pudding is a savory pudding made from cooking blood with a filler and spices. GROSS RIGHT?!! I thought so too and sneered at it disdainfully in Taiwan last summer. It's eaten all over the world and I thought it was about time I tried.
Anyway I digress, I'm not making Black Pudding in this post so don't worry. You're safe. What I am making are two different kinds of pudding. Raw Chocolate Chia Seed and Leftover Rice Pudding.
Okay so you may have noticed that I don't use much milk or dairy in my recipes. That's because it hurts my tummy so in all the recipes when I say milk, I'm using unsweetened almond milk which can easily be swapped out for regular milk.
Chia Seed Pudding
This one is SUPER EASY AND REALLY REALLY GOOD FOR YOU!! Chia seeds contain something like three times the daily necessary omega-3 oils and when you soak them they thicken. You can buy black or white chia seeds at most large grocery stores in the health food section but they tend to be expensive so keep your eyes peeled at bulk food stores and try to buy them like that.
I make a chia seed pudding almost every evening after supper.
I don't know where I got this from (we were NOT a dessert-after-dinner kind of family) but I always always crave something sweet after dinner. Before I sit down to eat, I put two heaping tablespoons chia seeds into a dessert dish (sometimes I do this in a wine glass cause it makes me feel fancy) with 1 cup unsweetened chocolate almond milk and 1 tablespoon maple syrup. And then just let it sit for a minimum of 15 minutes. Stir it a couple times before you eat it.
It get's to be the consistency of tapioca pudding but the seeds are a bit crunchier. Yum!!
Leftover Rice Pudding
You can make this with any kind of rice (hmmmmm or quinoa probably but I haven't tried it). I used leftover basmati rice.
Pre-heat oven to 350.
In a saucepan combine:
1 cup cooked rice
2 cups milk
and bring to a boil. Stir it often so it doesn't burn.
Beat together:
2 eggs
1/4 teaspoon Cinnamon
1 Tablespoon White sugar
3 Tablespoons Maple Sugar or Brown sugar or Maple Syrup (if you use syrup then you have to bake the pudding for an extra 10 minutes or it'll be soupy).
Add the egg mixture to the hot milk. MAKE SURE YOU KEEP STIRRING THE MILK AS YOU'RE POURING OTHERWISE THE EGG WILL COOK UNEVENLY. Pudding needs to be stirred, it's a custard thing.
Let the whole kit and caboodle cook on the stove for about a minute at a low simmer and then pour it into a glass baking dish with a lid. Cook for 20 minutes with the lid on. Take the lid off give it a stir and then cook for 10 minutes, lid off.
It's not the most attractive pudding so I made a maple syrup reduction (boil1/2 cup maple syrup to 112 degrees on your candy thermometer) and put a couple strawberries and mint leaves on top of each bowl. Drizzle it with the reduction and it looks much more presentable!
Thursday 17 May 2012
Thursday 3 May 2012
Soup's up!
Soup soup soup
I have two kinds of delicious soup sitting in my freezer which means that I don't have to cook for the next couple weeks!
I'm moving in two weeks and I don't want to buy more groceries. I'm in "using up what I got" mode and that can make for some interesting meals...
The two kinds of soup sitting my freezer are:
Roasted Garlic Potato Leek
and
Turk-ish Bean
Start by roasting a chicken...
Uuuuuum okay so that's how I started because the local meat guy had a sale on free-range birds.
Roasting a whole chicken is ridiculously easy.
Pre-heat the oven to 375
Rinse your bird and pat her dry.
Stuff the body cavity with an onion and an apple or an onion and whatever other piece of cold weather fruit you have on hand that needs usin'.
Rub the skin with olive oil and salt and pepper. Close her up and stick her in the oven for about and hour, depending on size.
A roasted bird was enough food for 2 chicken salad lunches, one chicken dinner and chicken stock for days. Awesome!!
To make the stock, toss a couple carrots, an onion quartered, some celery with the leafy bits, the chicken bones, and a bay leaf in a pot and cover with water.
Boil till the water has reduced by half. Boom stock.
The stock was the base for both my soups and I used the picked clean chicken bits in the Turk-ish Bean. Both these recipes would be equally delicious with Veg stock and no chicken bits.
ALL soups should be started by sauteing onions in a large pot until they are translucent.
Turk-ish Bean
Add one can of diced tomatoes, one can of chickpeas and one can of whatever other kind of beans you've got to your large pot that contains two onions sauted in oil. Add 2 cups chicken stock and here comes the Turk-ish part:
1/4 teaspoon cinnamon
1 teaspoon cummin
1/2 cayenne
I don't know if that spice combo is exactly Turkish but there you have it. I would NOT add more cinnamon than that, a little goes a long long way.
Salt your soup to taste. You can add (especially with homemade stock which is NOT as salty as store-bought) quite a bit. I probably, all together, put in about 1 Tablespoon but it's hard to tell cause I add and taste as I go.
Bring to a boil.
Eat. Freeze. Eat.
Roasted Garlic Potato Leek
Cut the top off a head of garlic, just enough so that you can see most of the flesh but you don't lose much meat. Place in the center of a square of tinfoil and drizzle with oil and sprinkle with a pinch of salt. Wrap that sucker up and place in the center of your oven. Turn the oven on and cook for about 40min as your oven heats up.
In that large pot that we talked about earlier that has some onion sauteing in it, add chopped up leek.
A word on cleaning leeks. First time I got one I had no idea how to clean it and well yeah it was gritty. So cut it up before you clean it and put the chopped bits into a colander. Rinse with cold water and use your fingers to separate all the layers so the water gets into all the little crevices. Alternatively, you can chop them and submerge them in water and then spin dry them in a salad spinner (my current kitchen doesn't have a salad spinner... it's off fraternizing with the slotted spoon...)
Saute these puppies up with the onion and then cover with 2 cups of stock and 2 cups of water. Add 4-6 potatoes, depending on their size. Be generous with the salt and pepper. Cook till the potatoes are tender.
Stick the pot outside to cool while the garlic finishes roasting. Once everything is cool enough to not make you swear and jump around after sticking your finger in it, ladle the soup into a blender.
I add all the garlic into the first blended batch cause you're gonna mix all the blender batches together and adjust the seasoning before you're done anyway.
It's a pretty bland looking soup so throw some fresh parsley or dill on top to pretty things up. Remember it's not how tasty it is that matters, it's how good it looks... nah just kidding!
Eat. Freeze. Eat.
Friday 24 February 2012
Kale GLORIOUS Kale!!
I love Kale.
I don't want to over analyze my relationship with this beautiful green goddess but I'll name just two in a myriad of reasons why Kale is the best green:
1. She is the only green that I can buy in the winter which was actually grown in Quebec.
2. She so damn good for y'all!
So here are two recipes, one of which is sinfully simple and the other of which is too fun to make cause you get to drink at the same time! Beeeeeeer!
Kale Salad
Wash, and cut the spine out of about 4 large leaves of Kale.
Chop them up into bite sized pieces and toss in a bowl.
Toss one green onion, chopped up in there too.
Whisk together:
The juice of half a lemon
3 Tbs olive oil
1/2 teaspoon salt
and some pepper
Pour this over the salad and let sit for about an hour. The salt and acidity of the lemon break the Kale down a tiny bit and make it really nummy.
To serve:
Add fresh dill (if you have it), feta cheese (mmmmmm goat feta...), and some kind of nut (LIKE ME! haha sorry couldn't resist)
Eat.
Spicy Sausage, Kale and Beer Soup
In a large pot, squeeze the innards out of 4 spicy sausages and saute until brown. Scoop the bits out of the pot and reserve for later.
Open your bitter, full flavoured IPA from the local microbrewery (or you know, whatever kind of beer you want) and have a drink.
Saute 1-2 diced onions in the drippings from your sausage and about 2 Tbs olive oil (depending on how greasy your sausages are, you might not need this much oil) until onions are translucent and tender.
Cover with 2-3 cups broth of your choosing and add about a cup of yellow split peas... you could use green, their just not as good looking, like Kermit said, "It isn't easy being green.
Take another sip of beer and then pour a generous glug glug into the pot. Bring this mixture to a boil and simmer until the potatoes are tender.
Add 4 to 5 leaves of washed, de-spined and chopped Kale and your sausage. Cook until kale is soft about 7 minutes.
Eat. Oh man, so delicious!
Thursday 16 February 2012
Choc-TASTIC!!! Quinoa Chocolate Cake with Dark Chocolate Ganache!
This past weekend was my wonderful friend Robin's birthday (but don't tell her I've mentioned her again in my blog, she`s getting kind of a big head about it) and due to some various dietary restrictions in the group, I decided to make her cake gluten-free, dairy-free.
Do not be concerned. This cake was so delicious that we devoured the leftovers the morning after her party like hungry sharks attacking their prey.
Wet:
2 cups cooked quinoa
1/2 cup almond milk (or other alternative milk)
4 eggs
1 tsp vanilla
3/4 cup canola oil
Dry:
1 1/2 cups sugar
1 cup unsweetened cocoa powder
1 Tbsp baking powder
1 tsp salt
So, start by cooking you quinoa. Give 2/3 of cup uncooked quinoa a good rinse and then toss it in a pot with 1 1/3 cup water. Bring to a hearty, rolling boil and then reduce heat, cooking about 15mins until water is absorbed and quinoa is tender.
This should make about 2 cups of cooked quinoa (it made a little extra for me so measure it out after it's cooked). In a food processor (I found that my friend's food processor worked really well for this cake because it kind of beats up the quinoa but you could probably make this using your brute strength) combine the milk, eggs, and vanilla. Add the cooked quinoa. Mix until blended and then gradually add the oil (or melted butter if you can have it).
In a separate bowl combine the dry ingredients. Mix them with a fork until everything is happily homogenous. Also the recipe I used called for 1 1/2 cups cocoa powder and while Robin`s cake turned out great, next time I make this I am only going to use 1 cup. That extra cup was just pushing the cake over from deliciously chocolatey to slightly chalky (only I noticed).
Bake at 350 in a well greased cake pan for 45-50 minutes.
Ganache
I have always known that ganache is the tastiest thing that can be poured/spread/slathered over a cake but I have always reserved it for FANCY occasions. I have now decided that that`s stupid. Ganache is the easiest icing to make. Period. It also fancy-fies just about any dessert. Want to look impressive? Make ganache.
Break two 100g bars of dark chocolate up into a bowl (Martha Stewart`s recipe calls for 8 ounces of bittersweet chocolate to 1 cup cream or milk. 200gs of chocolate is slightly more than 7 ounces)
Bring a scant cup (about 3/4) of almond milk (or other blah blah blah) to a boil in a saucepan and pour over your chocolate pieces. Whisk this marvelous mixture up until the chocolate has completely melted. Put the bowl in the fridge (or out on the front porch if it`s winter and your friend`s fridge is insanely full) and whisk it every ten minutes until it reaches the desired thickness. For me that meant a thick pourable and probably took 20 minutes to cool. You want to check it every ten minutes so that it cools evenly and so you don`t miss the pour/spread/slather stage.
My sister used this recipe on Valentine`s Day and almost missed the optimum window. She wanted to know if ganache can be reheated and I replied ABSOLUTELY!
My favourite thing to do is make a double batch and let it cool until it`s the texture of thick store bought icing. You can then slather on a thick layer and smooth it out as best as you can. Pop it in the fridge for 10-15 and then re-heat the remaining ganache in the microwave.
Remember when re-heating or melting chocolate in the microwave to do it in 5-10 sec spurts cause it burns or seizes really easily if you`re not careful.
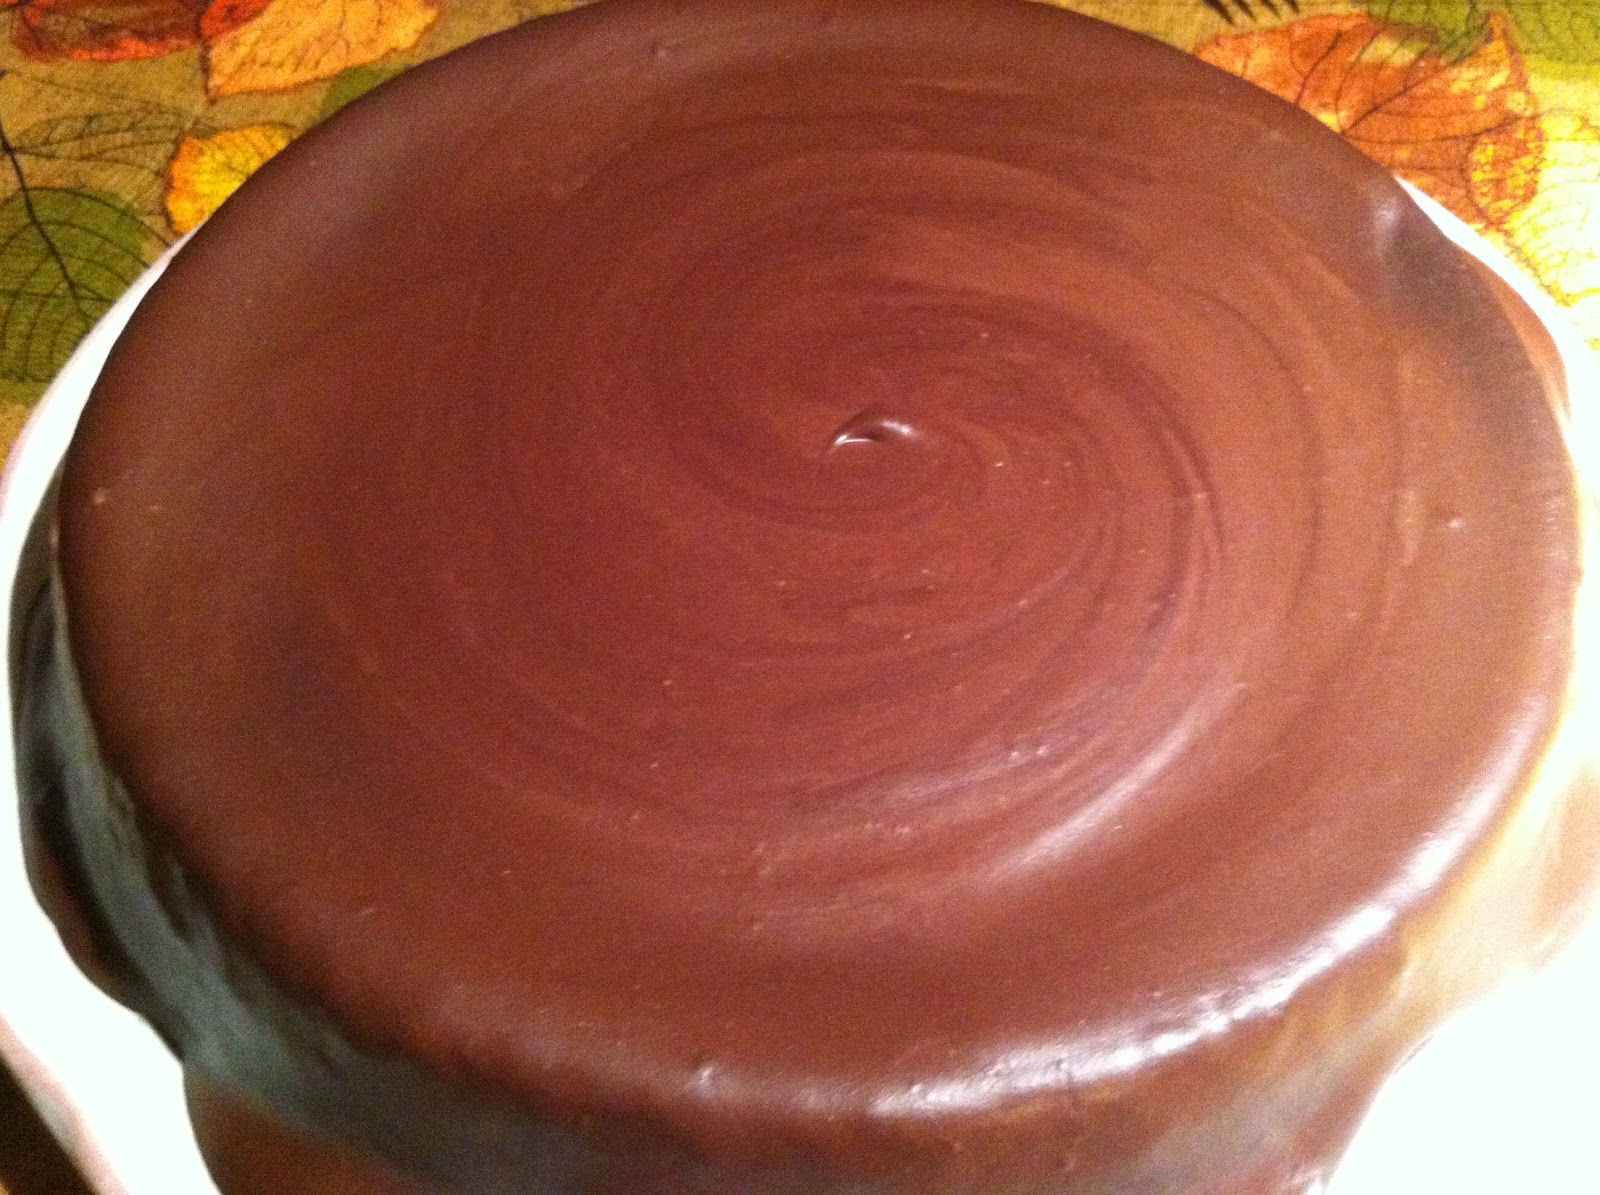
Once the ganache can be poured, transfer your cake to a wire cooling rack sitting on a cookie sheat and pour the hot ganache over the iced cake. You end up with a shiny, glossy shell on your cake that everyone will ooh and aah over. Once the outer layer has hardened, transfer it CAREFULLY from the cooling rack to your serving plate!
I learned the cooling rack trick at a bakery I used to work at. It gives your cake perfect edges, with no pooling on the serving plate. You better be ready to impress people with this one folks!
Serving instructions:
After an ENORMOUS DINNER and a long walk outside serve guests a dainty little slice on pretty china plates. The following morning emerge from your various crash spots and devour remaining cake like piranha's who haven`t seen flesh in about 90 years.

Do not be concerned. This cake was so delicious that we devoured the leftovers the morning after her party like hungry sharks attacking their prey.
Wet:
2 cups cooked quinoa
1/2 cup almond milk (or other alternative milk)
4 eggs
1 tsp vanilla
3/4 cup canola oil
Dry:
1 1/2 cups sugar
1 cup unsweetened cocoa powder
1 Tbsp baking powder
1 tsp salt
So, start by cooking you quinoa. Give 2/3 of cup uncooked quinoa a good rinse and then toss it in a pot with 1 1/3 cup water. Bring to a hearty, rolling boil and then reduce heat, cooking about 15mins until water is absorbed and quinoa is tender.
This should make about 2 cups of cooked quinoa (it made a little extra for me so measure it out after it's cooked). In a food processor (I found that my friend's food processor worked really well for this cake because it kind of beats up the quinoa but you could probably make this using your brute strength) combine the milk, eggs, and vanilla. Add the cooked quinoa. Mix until blended and then gradually add the oil (or melted butter if you can have it).
In a separate bowl combine the dry ingredients. Mix them with a fork until everything is happily homogenous. Also the recipe I used called for 1 1/2 cups cocoa powder and while Robin`s cake turned out great, next time I make this I am only going to use 1 cup. That extra cup was just pushing the cake over from deliciously chocolatey to slightly chalky (only I noticed).
Bake at 350 in a well greased cake pan for 45-50 minutes.
Ganache
I have always known that ganache is the tastiest thing that can be poured/spread/slathered over a cake but I have always reserved it for FANCY occasions. I have now decided that that`s stupid. Ganache is the easiest icing to make. Period. It also fancy-fies just about any dessert. Want to look impressive? Make ganache.
Break two 100g bars of dark chocolate up into a bowl (Martha Stewart`s recipe calls for 8 ounces of bittersweet chocolate to 1 cup cream or milk. 200gs of chocolate is slightly more than 7 ounces)
Bring a scant cup (about 3/4) of almond milk (or other blah blah blah) to a boil in a saucepan and pour over your chocolate pieces. Whisk this marvelous mixture up until the chocolate has completely melted. Put the bowl in the fridge (or out on the front porch if it`s winter and your friend`s fridge is insanely full) and whisk it every ten minutes until it reaches the desired thickness. For me that meant a thick pourable and probably took 20 minutes to cool. You want to check it every ten minutes so that it cools evenly and so you don`t miss the pour/spread/slather stage.
My sister used this recipe on Valentine`s Day and almost missed the optimum window. She wanted to know if ganache can be reheated and I replied ABSOLUTELY!
My favourite thing to do is make a double batch and let it cool until it`s the texture of thick store bought icing. You can then slather on a thick layer and smooth it out as best as you can. Pop it in the fridge for 10-15 and then re-heat the remaining ganache in the microwave.
Remember when re-heating or melting chocolate in the microwave to do it in 5-10 sec spurts cause it burns or seizes really easily if you`re not careful.
Once the ganache can be poured, transfer your cake to a wire cooling rack sitting on a cookie sheat and pour the hot ganache over the iced cake. You end up with a shiny, glossy shell on your cake that everyone will ooh and aah over. Once the outer layer has hardened, transfer it CAREFULLY from the cooling rack to your serving plate!
I learned the cooling rack trick at a bakery I used to work at. It gives your cake perfect edges, with no pooling on the serving plate. You better be ready to impress people with this one folks!
Serving instructions:
After an ENORMOUS DINNER and a long walk outside serve guests a dainty little slice on pretty china plates. The following morning emerge from your various crash spots and devour remaining cake like piranha's who haven`t seen flesh in about 90 years.
Sunday 15 January 2012
Dukhobor Borscht! So delicious
This is the wintery companion piece to my earlier Borscht post.
Dukhobor Borscht is quite different from Russian Borscht. It only has one beet that is cut in half and boiled in the stock it is then unceremoniously removed and discarded (or eaten, if you're like me and love beets). Dukhobor Borscht also takes kind of a long time to make and is full of steps. Each vegetable is sauted before you put it in the pot and it contains both diced and mashed potatoes. But trust me on this one guys it is TOTALLY worth the effort.
The recipe I have makes a big batch that I will be freezing. Tonight I'm eating it with cabbage-potato pancakes and plain yogurt.
Let's go!
Ingredients:
1 large can whole tomatoes
1 1/2 cups Butter or olive oil (okay so that's the amount the recipe actually calls for but I end up using probably a third of that. When you saute all the veg in that much butter it does taste delicious though... so I'll leave the amount decision up to your excellent discretion)
3-4 medium onions (should make about a cup of chopped onion)
1 carrot, grated
1 carrot, chopped
2/3 of a cabbage (should make about 3 cups shredded)
5-8 potatoes
1 cup Cream (optional)
1 medium beet
Dill
Salt (or dill-salt)
Before you start sauteing:
Put into a LARGE pot one and a half quart sized mason jars of water (you know the size of jar, think those glass ones that you get spaghetti sauce in).
1 1/2 teaspoons salt (I have dill salt that a friend gave me so I'm using that. Also because at this time of year fresh dill costs more than I care to spend)
3/4 of your potatoes washed and quartered
The chopped carrot
The beet, halved
Boil until the potatoes are tender enough to remove and mash. When they are tender enough to do that, then do it. Mash with olive oil (I made an almost no dairy version of this recipe so whenever I say "olive oil and salt" feel free to read "butter"), salt and cream (If you want. I used a bit of plain yogurt)
Start the sauteing process by dumping the can of tomatoes into a large frying pan with some olive oil and salt and give the tomatoes a gentle mash. Let this simmer till it thickens. Dump that in a big ol'bowl and put it off to the side.
In your large frying pan put in a generous drizzle-glop of olive oil and add the onion and grated carrot with a dash of salt. Saute this until everything is nice and tender. Onions should be translucent not brown. Dump into the tomato bowl and set aside.
Add a generous drizzle-glop of olive oil and add your cabbage. Saute until tender and then...
When the potatoes are tender enough and you've removed and mashed them, add the remaining potatoes diced, and the cabbage. Cook this until the now diced potatoes are tender but not mooshy.
What you should have by now is a big bowl with tomato, carrot and onion in it, another bowl full of mashed potatoes and a big pot with diced potatoes and carrots and beet stock. You can remove the halved beet at this point and add the tomato, carrot bowl. Bring this up to a boil and gradually add the mashed potatoes.
The borscht ends up an amazing texture because of the diced and mashed potatoes and it tastes amazing! Putting fresh dill or parsley in at this point is also nice. Enjoy!! I sure am!
Sunday 4 December 2011
Felafel Success!!!!!!!!!!
This weekend I had a ravishingly radiant Robin visitor!! She inspired me to make attempt #2 of homemade felafels... attempt #1 being a resounding and resplendent failure.
Long story short my mixture (from canned chickpeas) was too soupy and my carefully formed balls disintegrated in the frying oil. Quel dommage!!
But this time around they were perfect!

Seriously! How good do those look?!! Haha I knew this post was going to have a lot of exclamation points in it!
The trick, I've discovered, is to use dried chickpeas and not to cook them.
So...
Put 1 cup of dried chickpeas in a bowl full of cold water and let them soak overnight.
A few hours before you want to eat dinner, assemble your felafel balls and refrigerate them. The recipe I was using says this helps keep them together in the hot oil.
In a food processor add:
drained chickpeas
1/2 cup fresh chopped parsley
1 small onion
4 ish cloves of garlic
1/2 tsp baking powder
1 tsp chili powder
1 tsp salt
1 tsp cummin
Whuge everything together until combined and then add 2-4 tablespoons of flour. The flour helps dry the mixture out so it depends on humidity etc for the amount. You should be able to form the mixture into a ball in your hand without it seriously sticking.
Form into walnut sized balls and refrigerate.
When you're ready to eat them, heat 1 1/2-2 inches of oil in a frying pan at medium high heat.
Check to see if the oil is hot enough by spattering a couple TINY droplets of water into the pan. If they crackle and spit then the oils hot enough. I usually just wet a few of my fingers under the tap and kind of flick them at the surface of the oil. Feel free to flick water at your friend at this point as well.

I then put the felafel balls into the frying oil and fried them for about 5 minutes on one side and then probably 3 minutes on the other. I have metal tongs that I used to turn them and they came out a beautiful golden brown!!
We ate them in whole wheat petas with fresh tomato, grated carrot, lettuce, hummus and tatziki. How does one make Tatziki you might ask? Simple.
Grate half a cucumber into a sieve, over a bowl and salt it. Leave the cucumber to drain for a couple hours to get some of the water out.
You can skip this step and just mix it all together but if you keep the tatziki overnight the water you didn't drain out separates from the yogurt and whole thing gets kind of weird. And not good weird.
Mix the drained cucumber with garlic, salt, pepper, the juice of one half lemon, fresh dill or parsley and a little over half a cup of plain yogurt. Slather generously on Felafel.
 Eat and be joyful!!!!!!
My plan is to make up the rest of the felafel mixture tonight and freeze half of them raw and the other half fried and see which way works better. I'm kind of hoping that the ones I fry will be initially soggy when defrosted but after popping them in the oven they'll crisp up again. I'll let you know how it all turns out. I promise.
Long story short my mixture (from canned chickpeas) was too soupy and my carefully formed balls disintegrated in the frying oil. Quel dommage!!

Seriously! How good do those look?!! Haha I knew this post was going to have a lot of exclamation points in it!
The trick, I've discovered, is to use dried chickpeas and not to cook them.
So...
Put 1 cup of dried chickpeas in a bowl full of cold water and let them soak overnight.
A few hours before you want to eat dinner, assemble your felafel balls and refrigerate them. The recipe I was using says this helps keep them together in the hot oil.
In a food processor add:
drained chickpeas
1/2 cup fresh chopped parsley
1 small onion
4 ish cloves of garlic
1/2 tsp baking powder
1 tsp chili powder
1 tsp salt
1 tsp cummin
Whuge everything together until combined and then add 2-4 tablespoons of flour. The flour helps dry the mixture out so it depends on humidity etc for the amount. You should be able to form the mixture into a ball in your hand without it seriously sticking.
Form into walnut sized balls and refrigerate.
When you're ready to eat them, heat 1 1/2-2 inches of oil in a frying pan at medium high heat.
Check to see if the oil is hot enough by spattering a couple TINY droplets of water into the pan. If they crackle and spit then the oils hot enough. I usually just wet a few of my fingers under the tap and kind of flick them at the surface of the oil. Feel free to flick water at your friend at this point as well.

I then put the felafel balls into the frying oil and fried them for about 5 minutes on one side and then probably 3 minutes on the other. I have metal tongs that I used to turn them and they came out a beautiful golden brown!!
We ate them in whole wheat petas with fresh tomato, grated carrot, lettuce, hummus and tatziki. How does one make Tatziki you might ask? Simple.
Grate half a cucumber into a sieve, over a bowl and salt it. Leave the cucumber to drain for a couple hours to get some of the water out.
You can skip this step and just mix it all together but if you keep the tatziki overnight the water you didn't drain out separates from the yogurt and whole thing gets kind of weird. And not good weird.
Mix the drained cucumber with garlic, salt, pepper, the juice of one half lemon, fresh dill or parsley and a little over half a cup of plain yogurt. Slather generously on Felafel.

My plan is to make up the rest of the felafel mixture tonight and freeze half of them raw and the other half fried and see which way works better. I'm kind of hoping that the ones I fry will be initially soggy when defrosted but after popping them in the oven they'll crisp up again. I'll let you know how it all turns out. I promise.
Monday 21 November 2011
Chicken and Resting on My Laurels.
So you may have noticed that I haven't blogged in a while. Well that's the thing with being one person who consistently makes enough food for four! I always freeze my extras and that's what I've been eating for the past two weeks.
Sorry but I just didn't feel that a post about defrosting spaghetti sauce was really gonne be that interesting!
Today I made something that was all kinds of delicious!
Basically shake'n'bake chicken legs but I made all the stuff myself.
So what I've recently discovered (while reading recipe blog after recipe blog about fried southern chicken, I don't know I think it's a cold weather craving...) that if you give chicken a buttermilk bath before coating it and frying it, well it's just the darn-tootenist!
I didn't fry my chicken. My reason? Honestly? It seemed wasteful to use that much oil. I wasn't worried about the calories, or the dangers of a pan full of boiling oil but the cost. Of oil, which might be one of the cheapest things in my pantry. It's official, I am the cheapest human alive.
Another thing, who buys buttermilk? Bizarre. There's not really much else to do with it but bathe chicken legs... and I can eat a lot of chicken but that's ridiculous. So wherever a recipe calls for buttermilk I use watered down plain yogurt. Wherever a recipe calls for sour cream I also use yogurt. I am a fan of the yogurt.
So I made a little swimming pool for my poultry legs with:
The juice of one half lemon
Several glops of yogurt
A chopped up clove of garlic
And a teaspoon of cumin
I let them marinate for about 2 hours and then I shook of the marinade and coated them in salt and pepper seasoned cornmeal.
Bake for 30-40 minutes at 350 and enjoy!!

Subscribe to:
Posts (Atom)